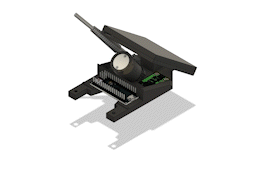
Build Instructions
Instructions for building the SLURP Gripper
Required Parts
| Part | Quantity | Purchase Link |
|---|---|---|
| Arduino Nano Every | 2 | https://www.amazon.com/Arduino-Nano-Every-Single-Board/dp/B07VX7MX27/ |
| Breadboard Jumper Wires | 1 Package | https://www.amazon.com/EDGELEC-Breadboard-1pin-1pin-Connector-Multicolored/dp/B07GD312VG |
| Wide Angle Reflector | 1 | https://www.digikey.com/en/products/detail/carclo-technical-plastics/10170/2641626 |
| Quartz Tungsten Halogen Bulb | 1 | https://www.thorlabs.com/thorproduct.cfm?partnumber=QTH10B |
| SMA Bulkhead Adapter | 1 | https://www.thorlabs.com/thorproduct.cfm?partnumber=HASMA |
| SMA Fiber Adapter | 1 | https://www.thorlabs.com/thorproduct.cfm?partnumber=SM1SMA |
| Fiber Optic Cable | 1 | https://www.thorlabs.com/thorproduct.cfm?partnumber=M59L01 |
| Time of Flight Sensor | 1 | https://learn.adafruit.com/adafruit-vl53l4cd-time-of-flight-distance-sensor |
| SpectraPod OEM Board | 1 | https://www.mantispectra.com/the-spectrapod/ |
| C12880MA Micro-Spectrometer | 1 | https://groupgets.com/manufacturers/hamamatsu-photonics/products/c12880ma-micro-spectrometer |
| Teflon PTFE | 1 | https://www.mcmaster.com/8735K25/ |
| M2.5 Nuts | 1 Package | https://www.mcmaster.com/90370A202 |
| M2.5 Bolts | 1 Package | https://www.mcmaster.com/91292A010 |
| M1.6 Bolts | 1 Package | https://www.mcmaster.com/91292A263 |
| M2.0 Heat-Set Inserts | 4 | https://www.mcmaster.com/94180A312 |
| M2.0 Bolts | 1 Package | https://www.mcmaster.com/91292A833 |
| Light Sockets | 1 Package | https://www.amazon.com/Bi-Pin-Socket-Watts-Ceramic-Covers/dp/B0156X9HEK/ |
| Barrel Jack Adapter | 1 | https://www.amazon.com/Power-Connector-Female-Adapter-Camera/dp/B07C61434H |
Assembly Instructions
-
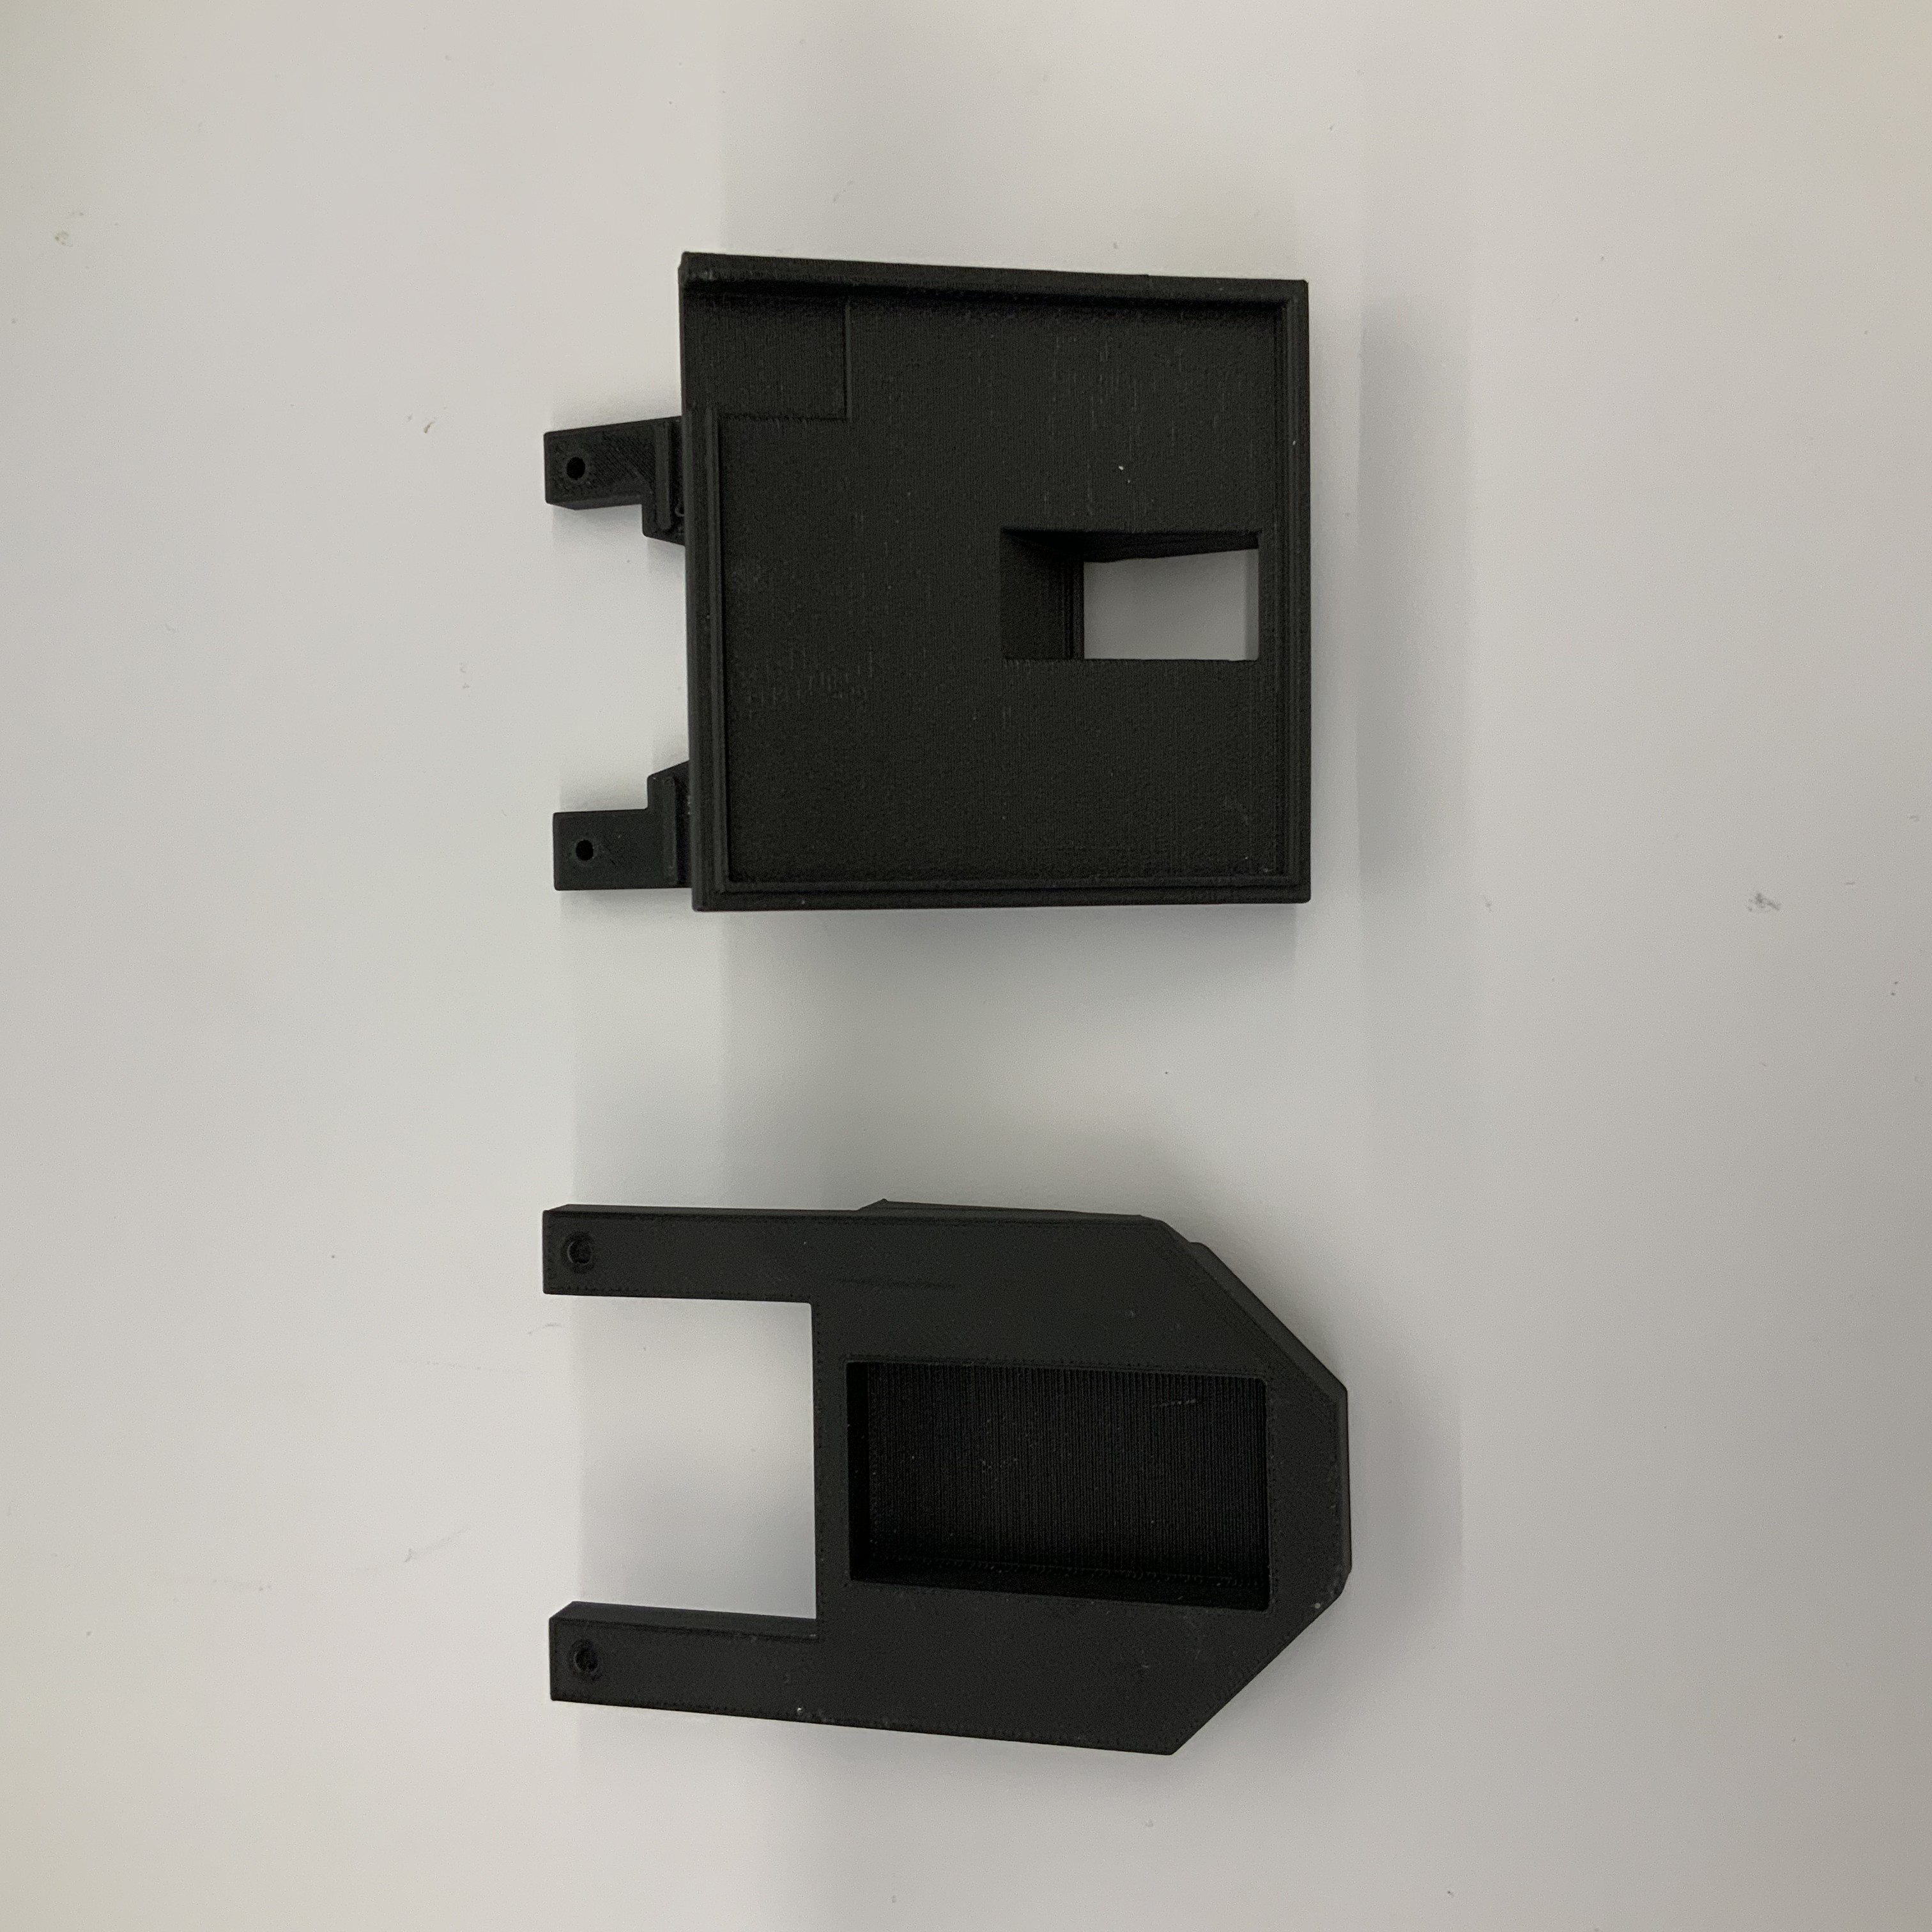
Using the CAD files in the GitHub repo, print the gripper paddles. Onyx is recommended for rigidity. The reflectance tile gripper is on the left; the sensor gripper on the right.
-
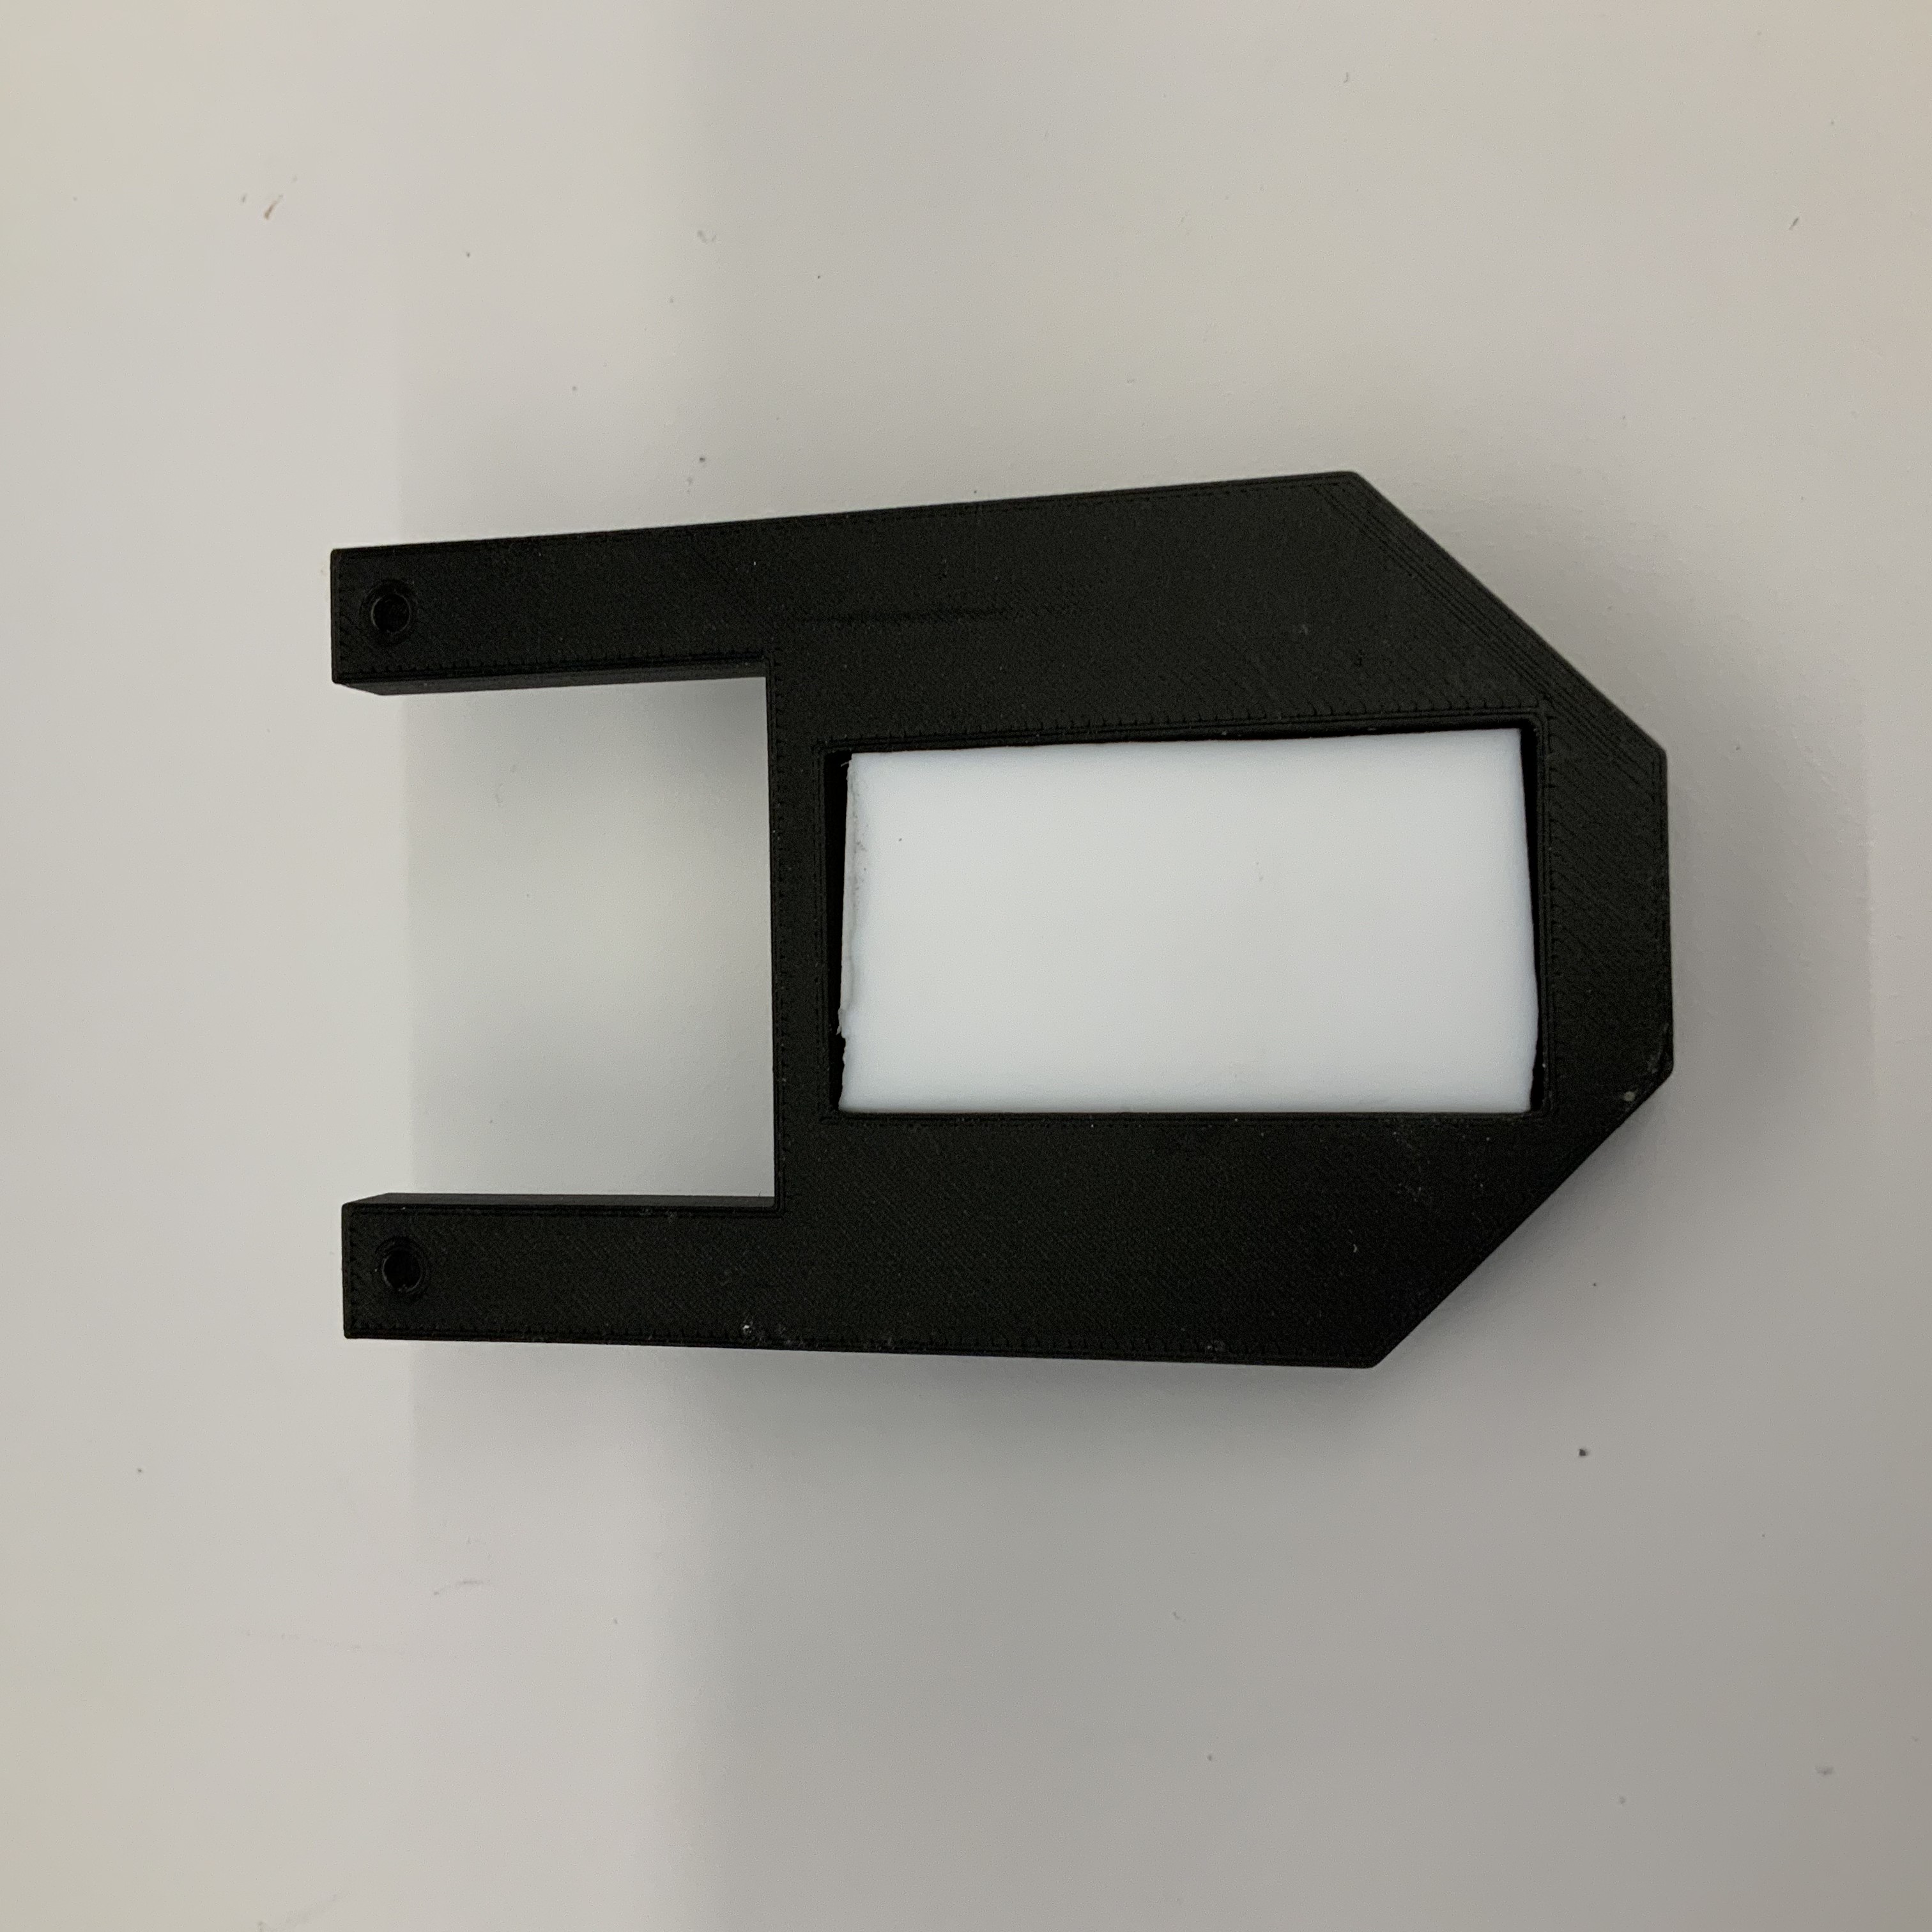
Cut a 218mm piece of the Teflon bar and press fit into the cavity on the reflectance tile gripper paddle.
-
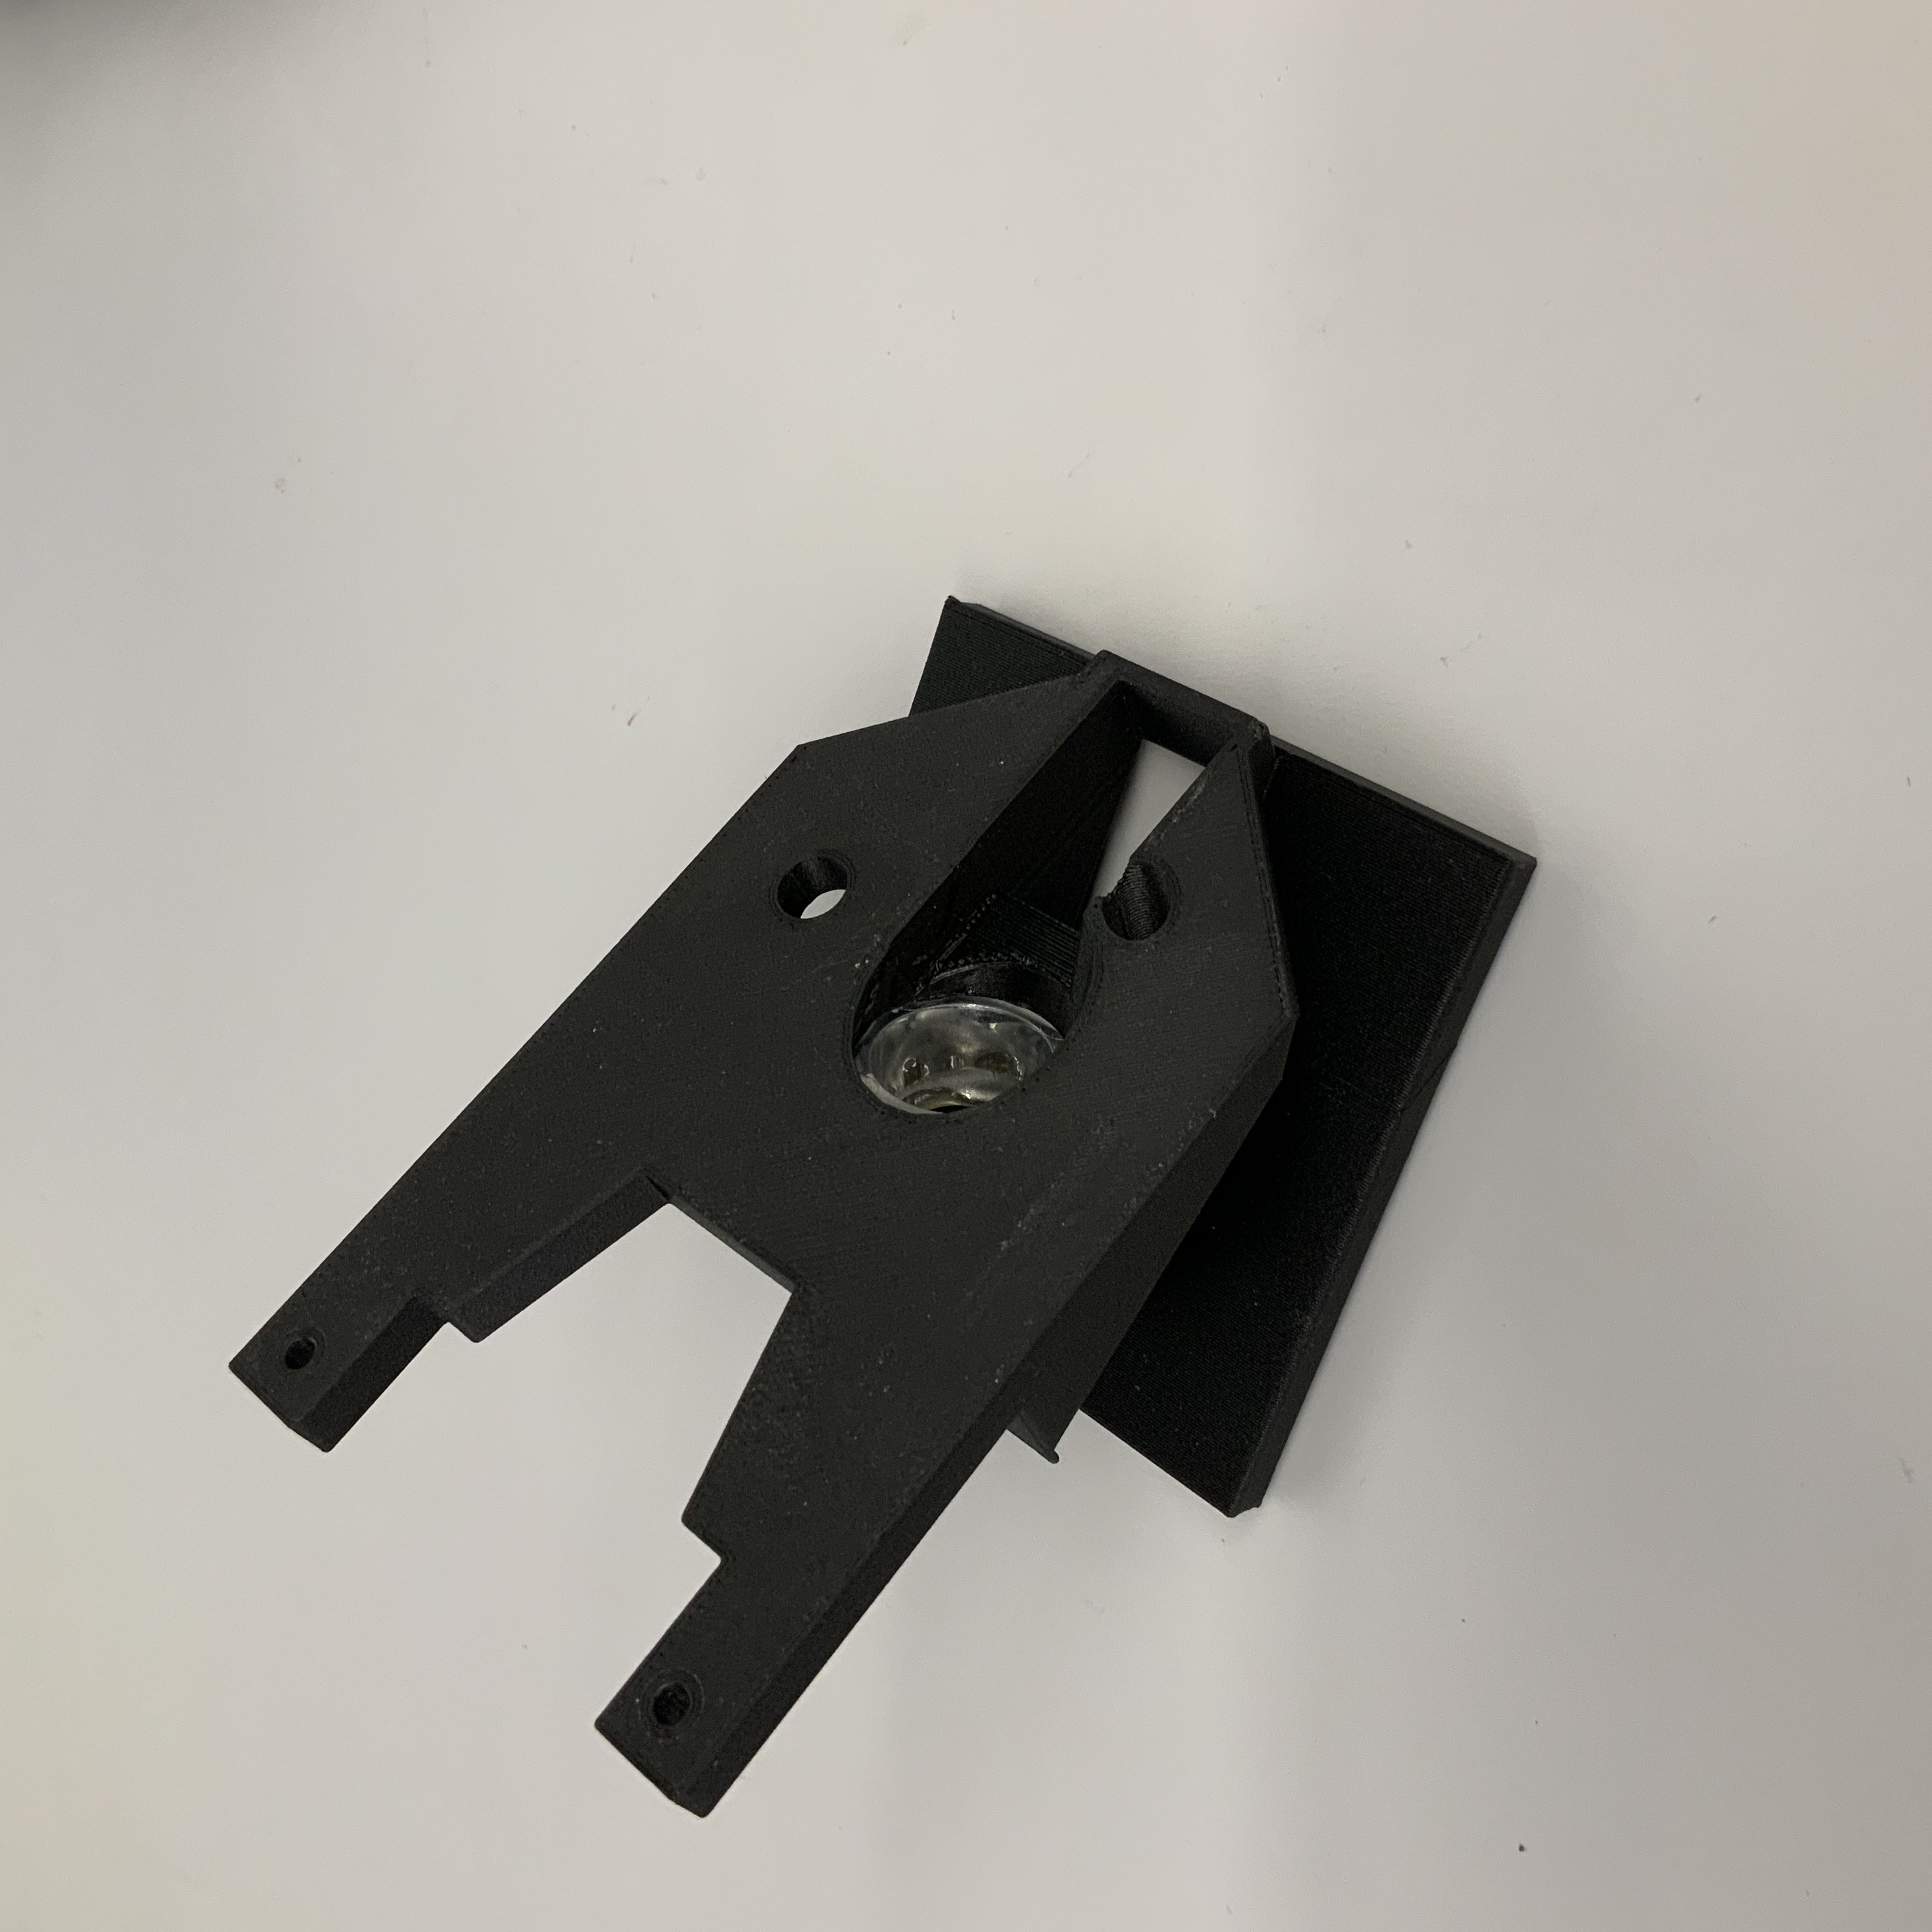
Take the reflector and add a thin bead of epoxy to its bottom. Press into the gripper.
-
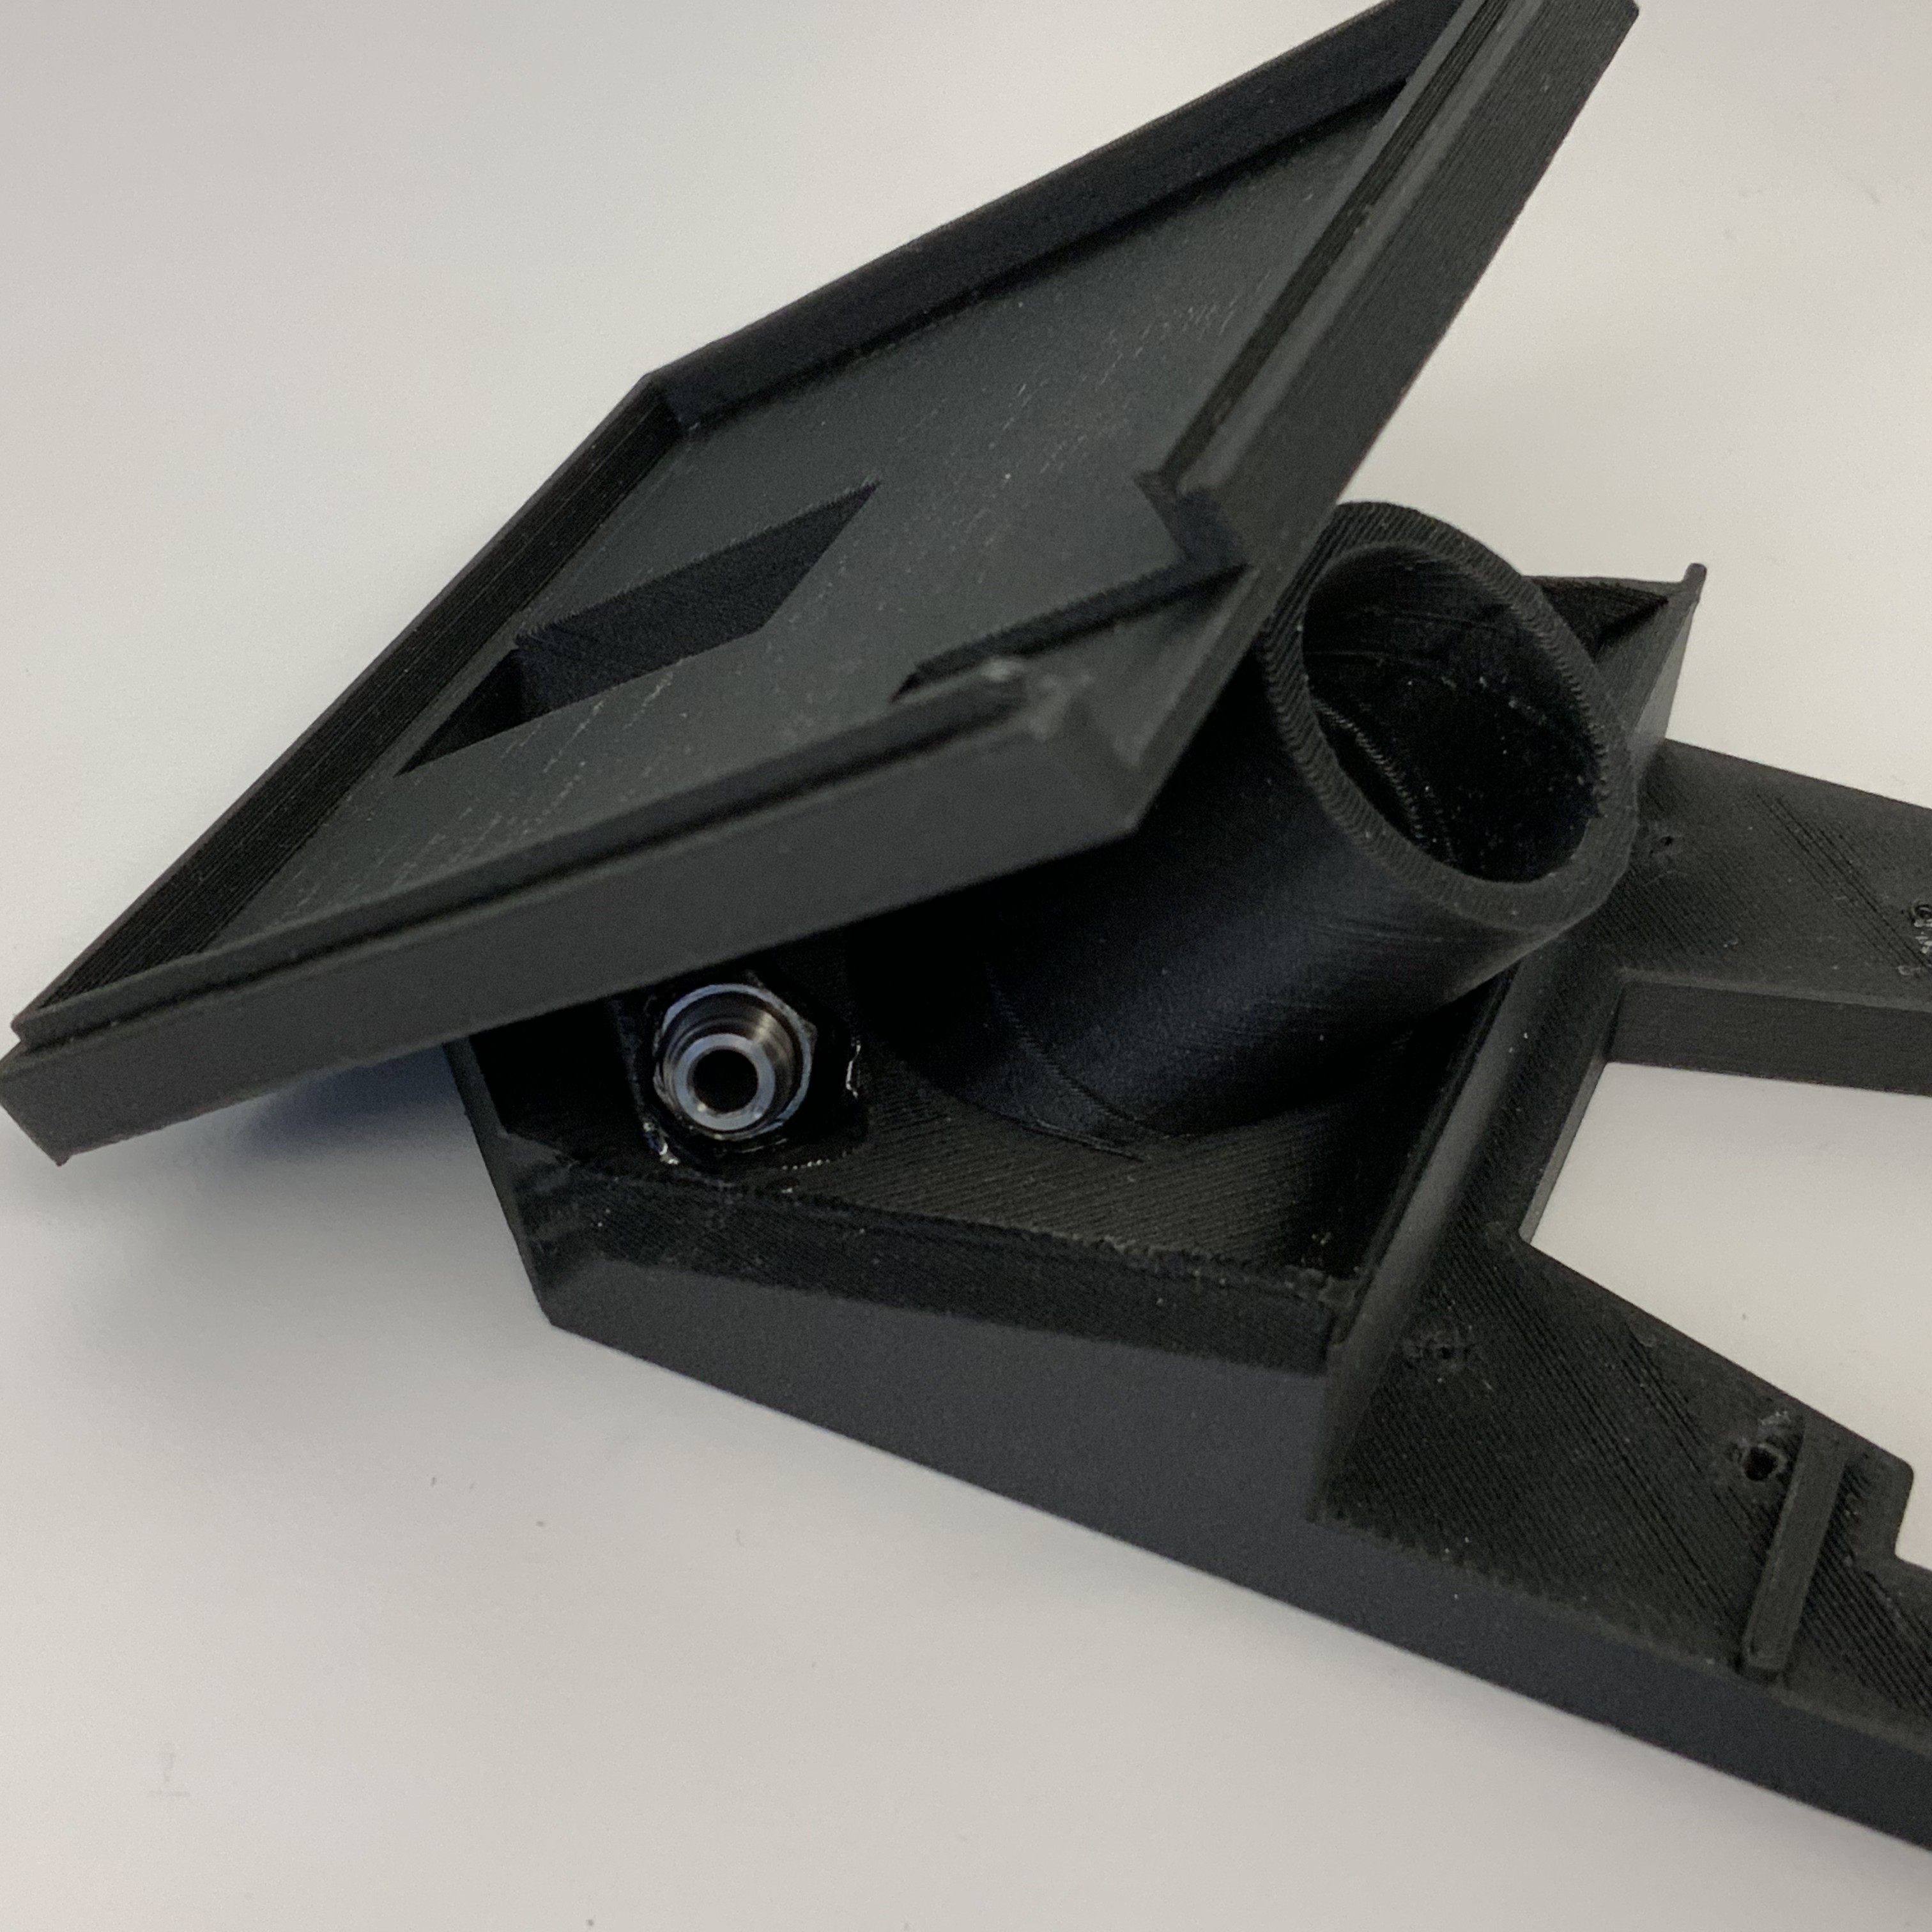
Place the SMA adapter in the hex shaped cavity shown below. Apply epoxy to ensure a tight fit.
-
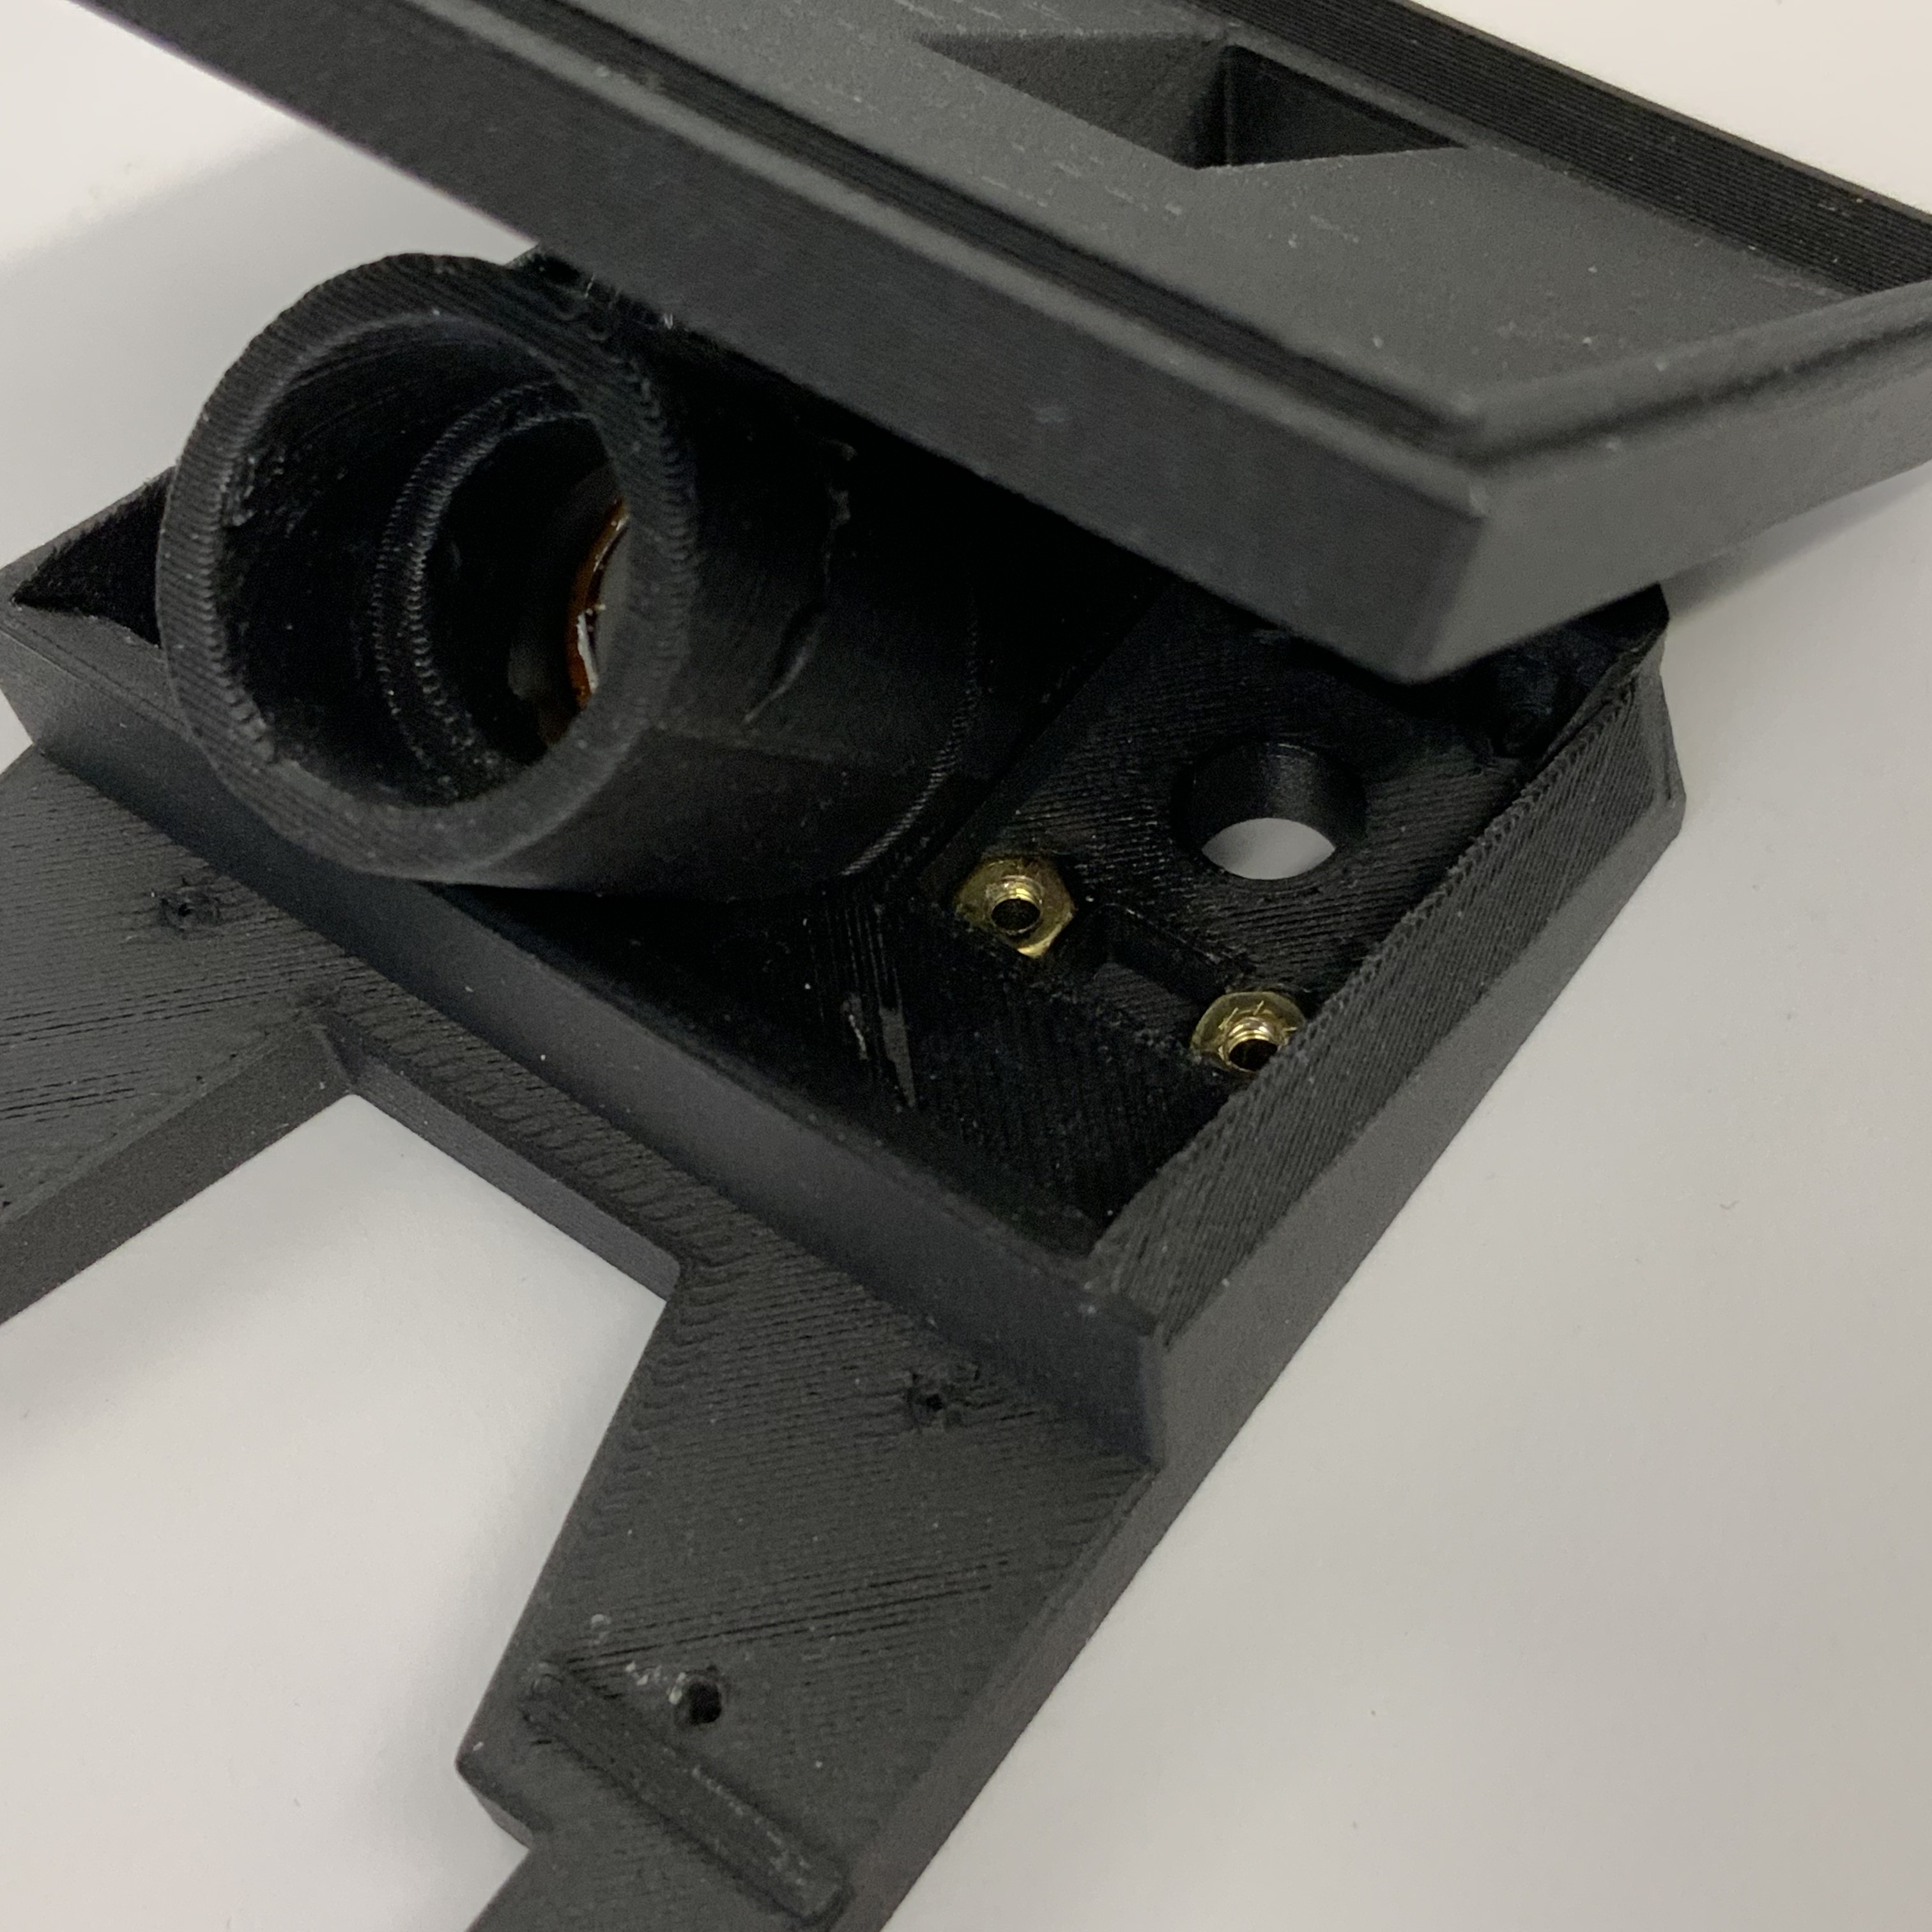
Using a small hammer, gently tap the M2.5 nuts into the inset holes.
-
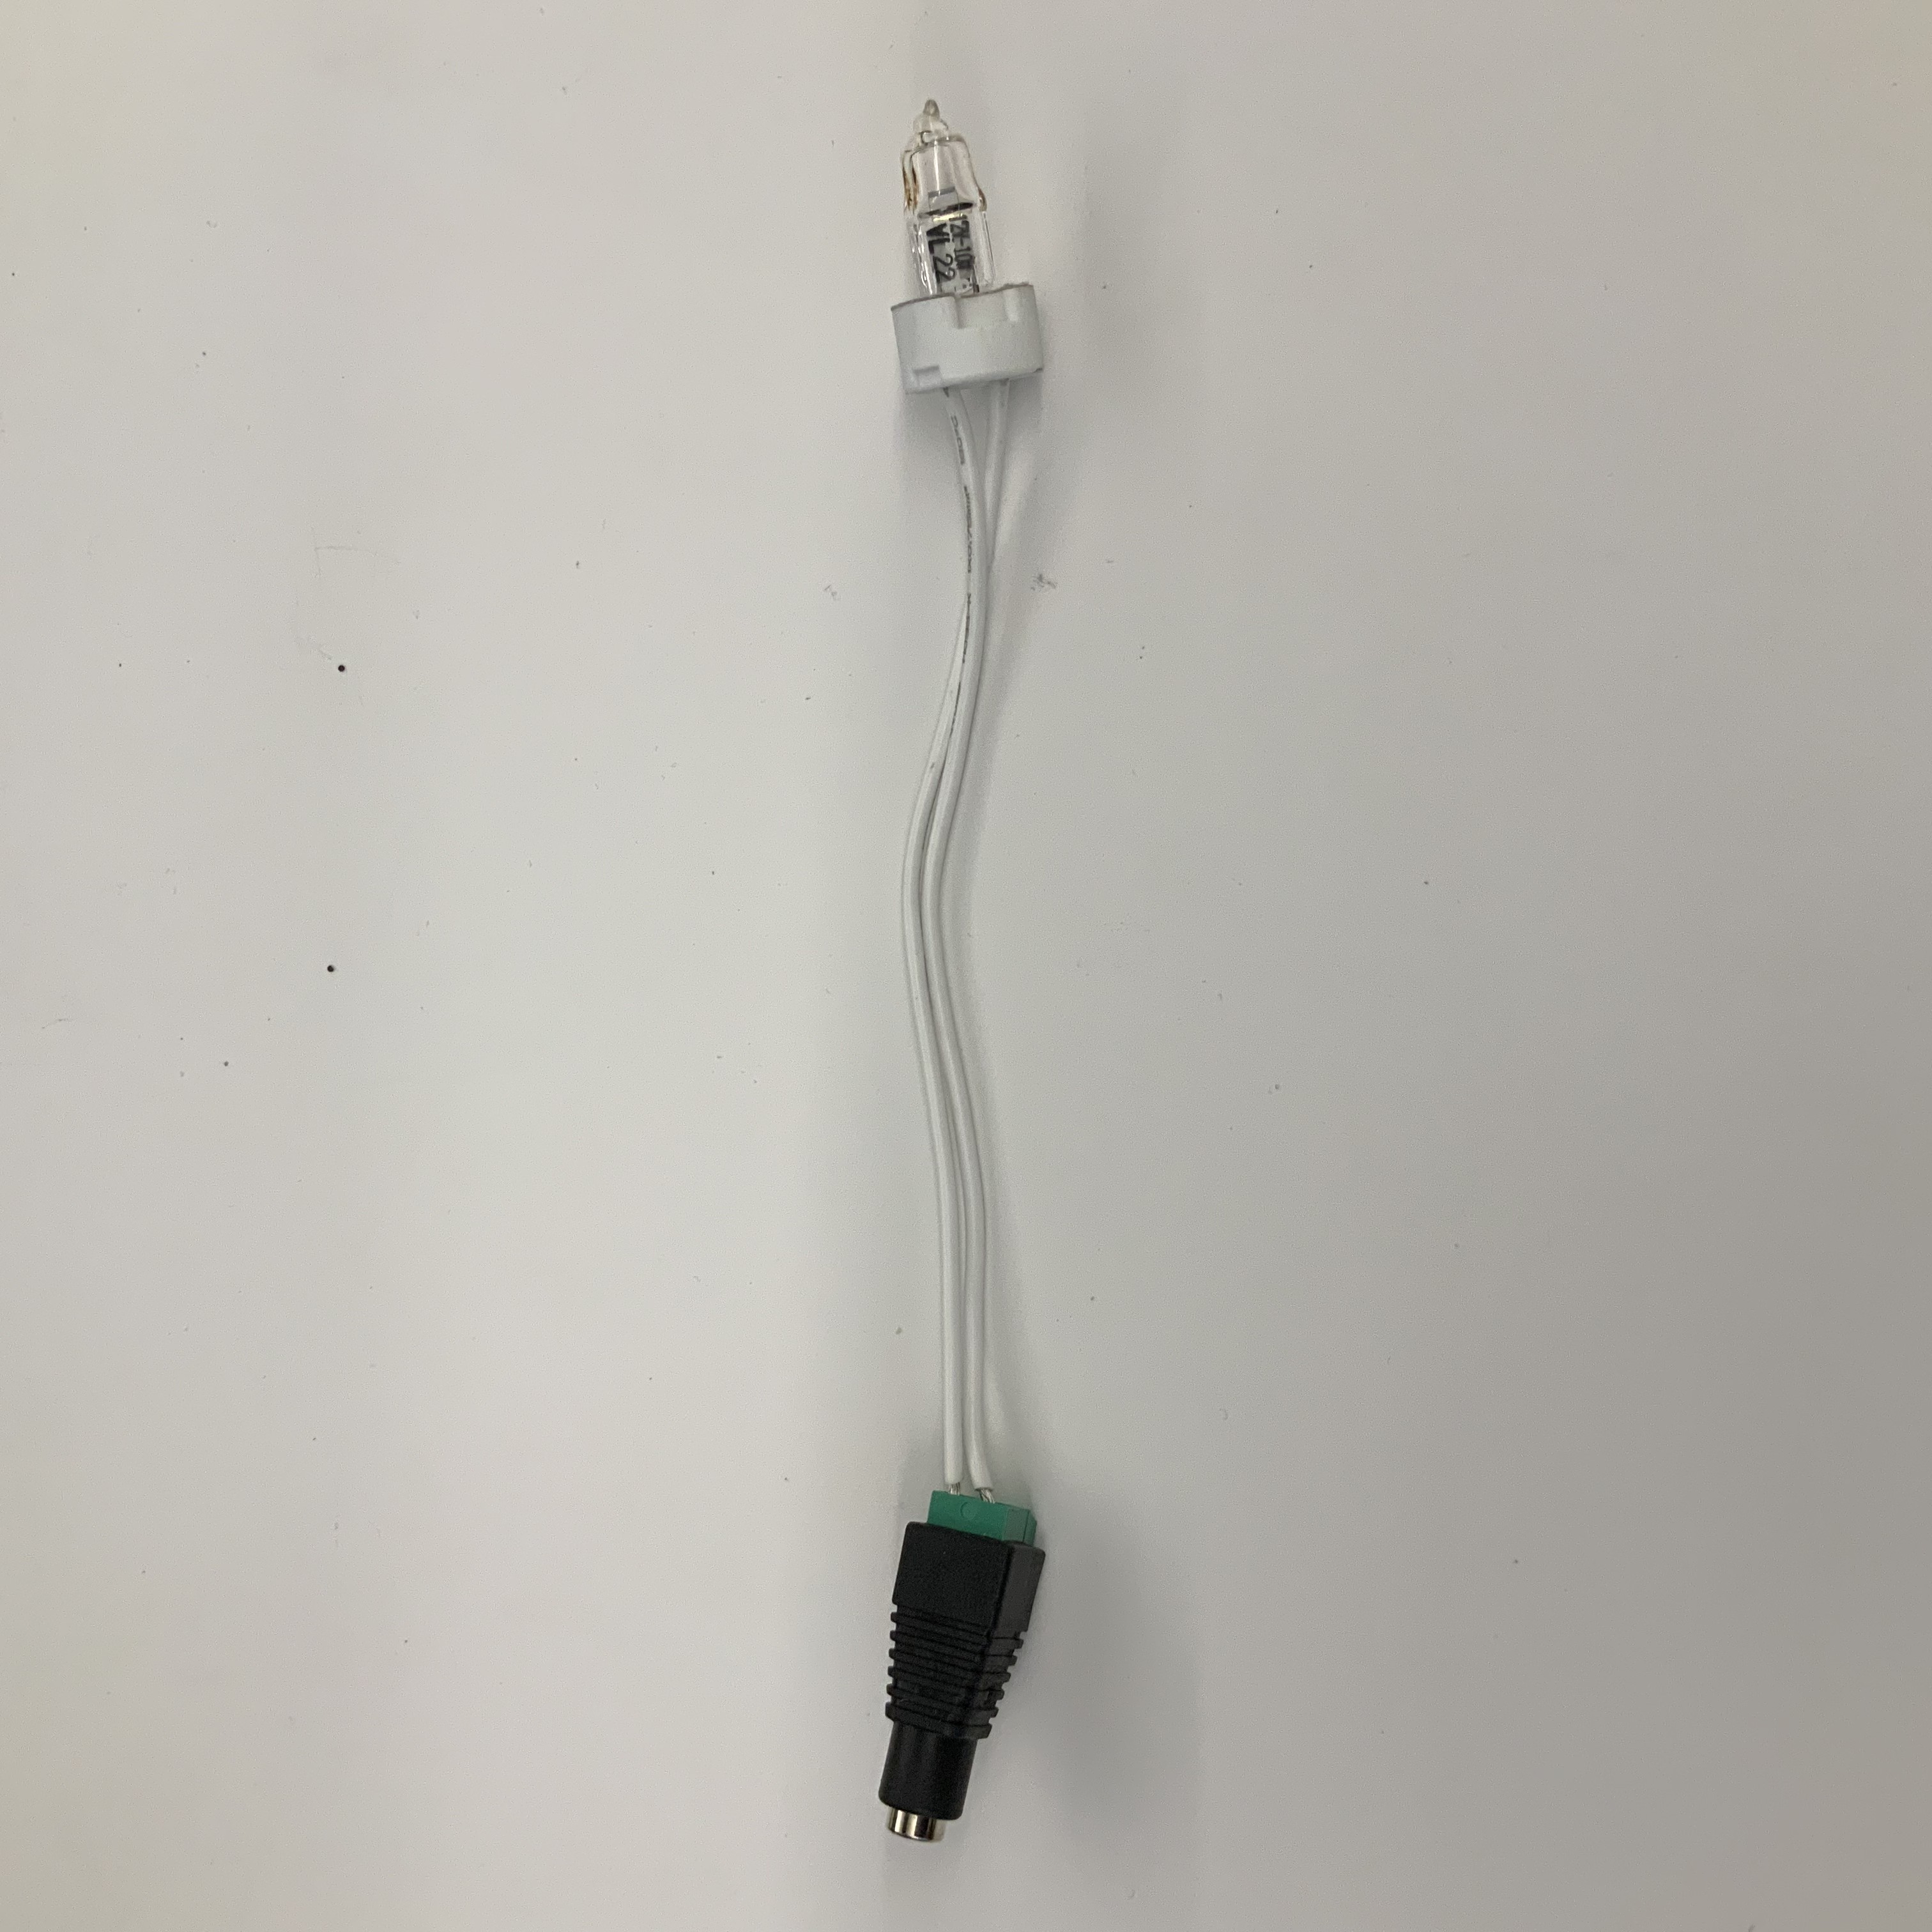
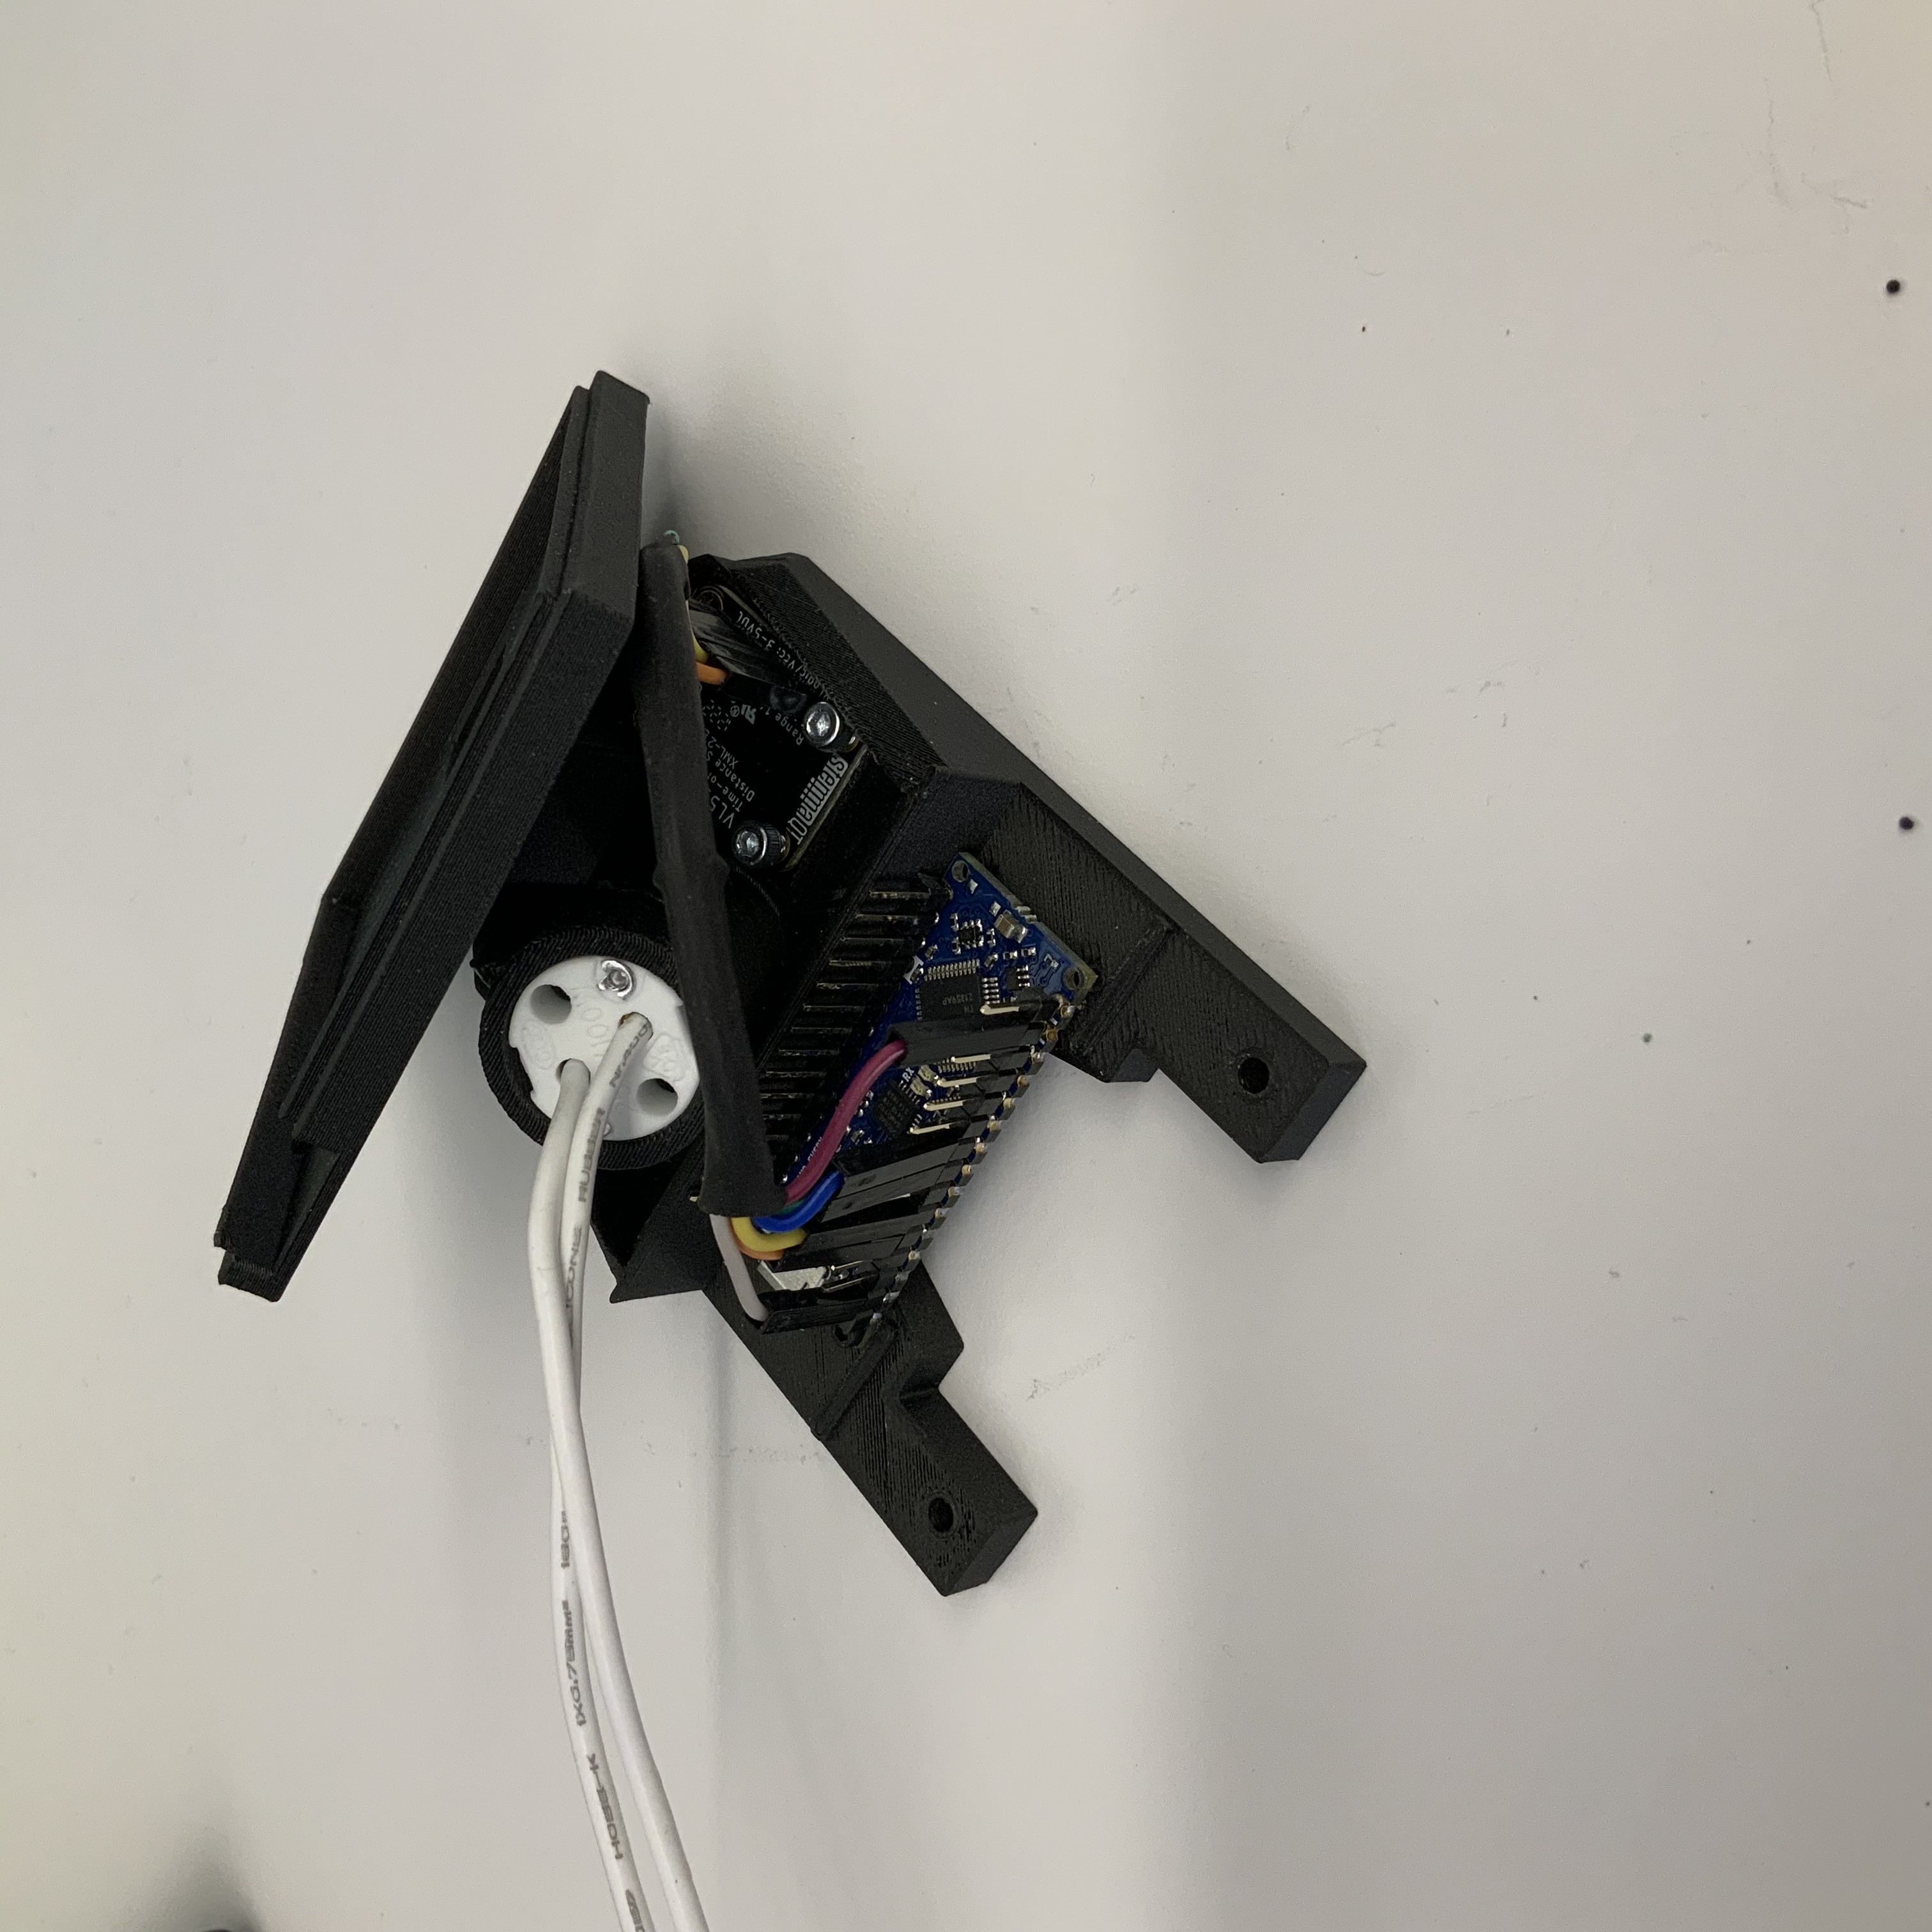
Assemble the light source by inserting the pins of a QTH bulb into the socket. Screw on the barrel jack adapter. A variable voltage power supply can be used to power the bulb, but a constant 6V source is acceptable.
-
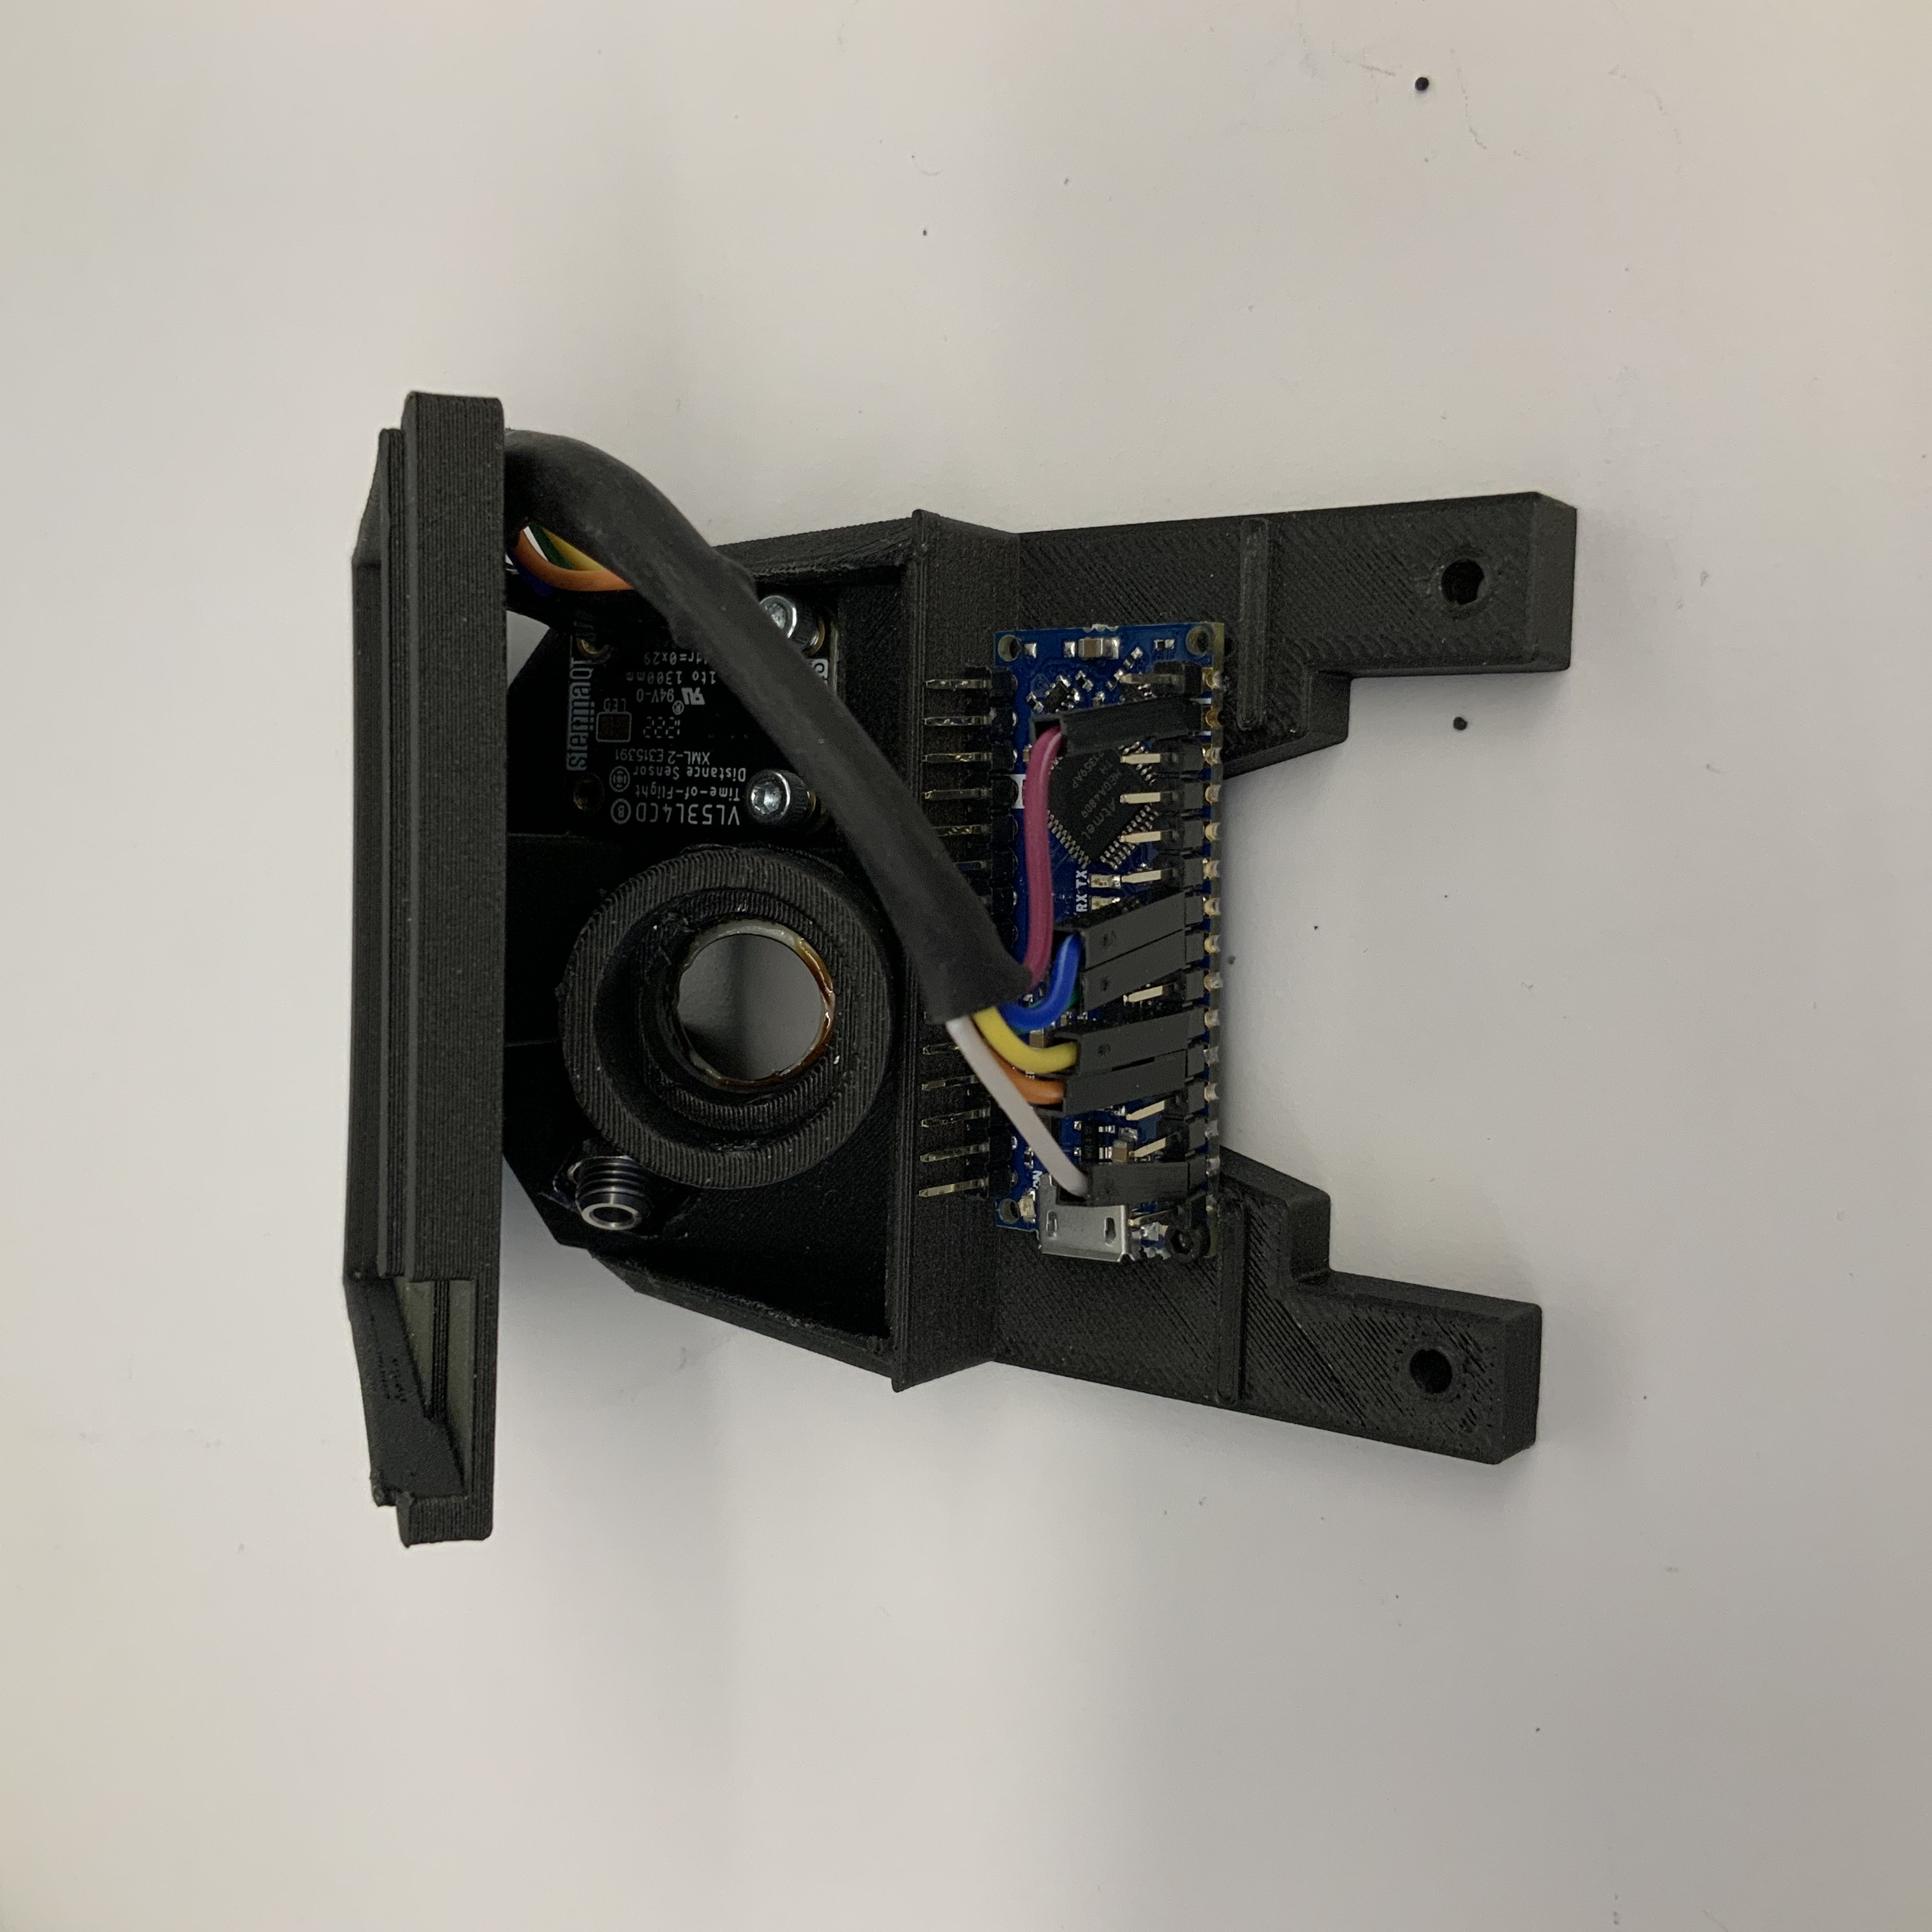
Connect the TOF to the Arduino Nano using the jumper cables using the wiring guide here.
-
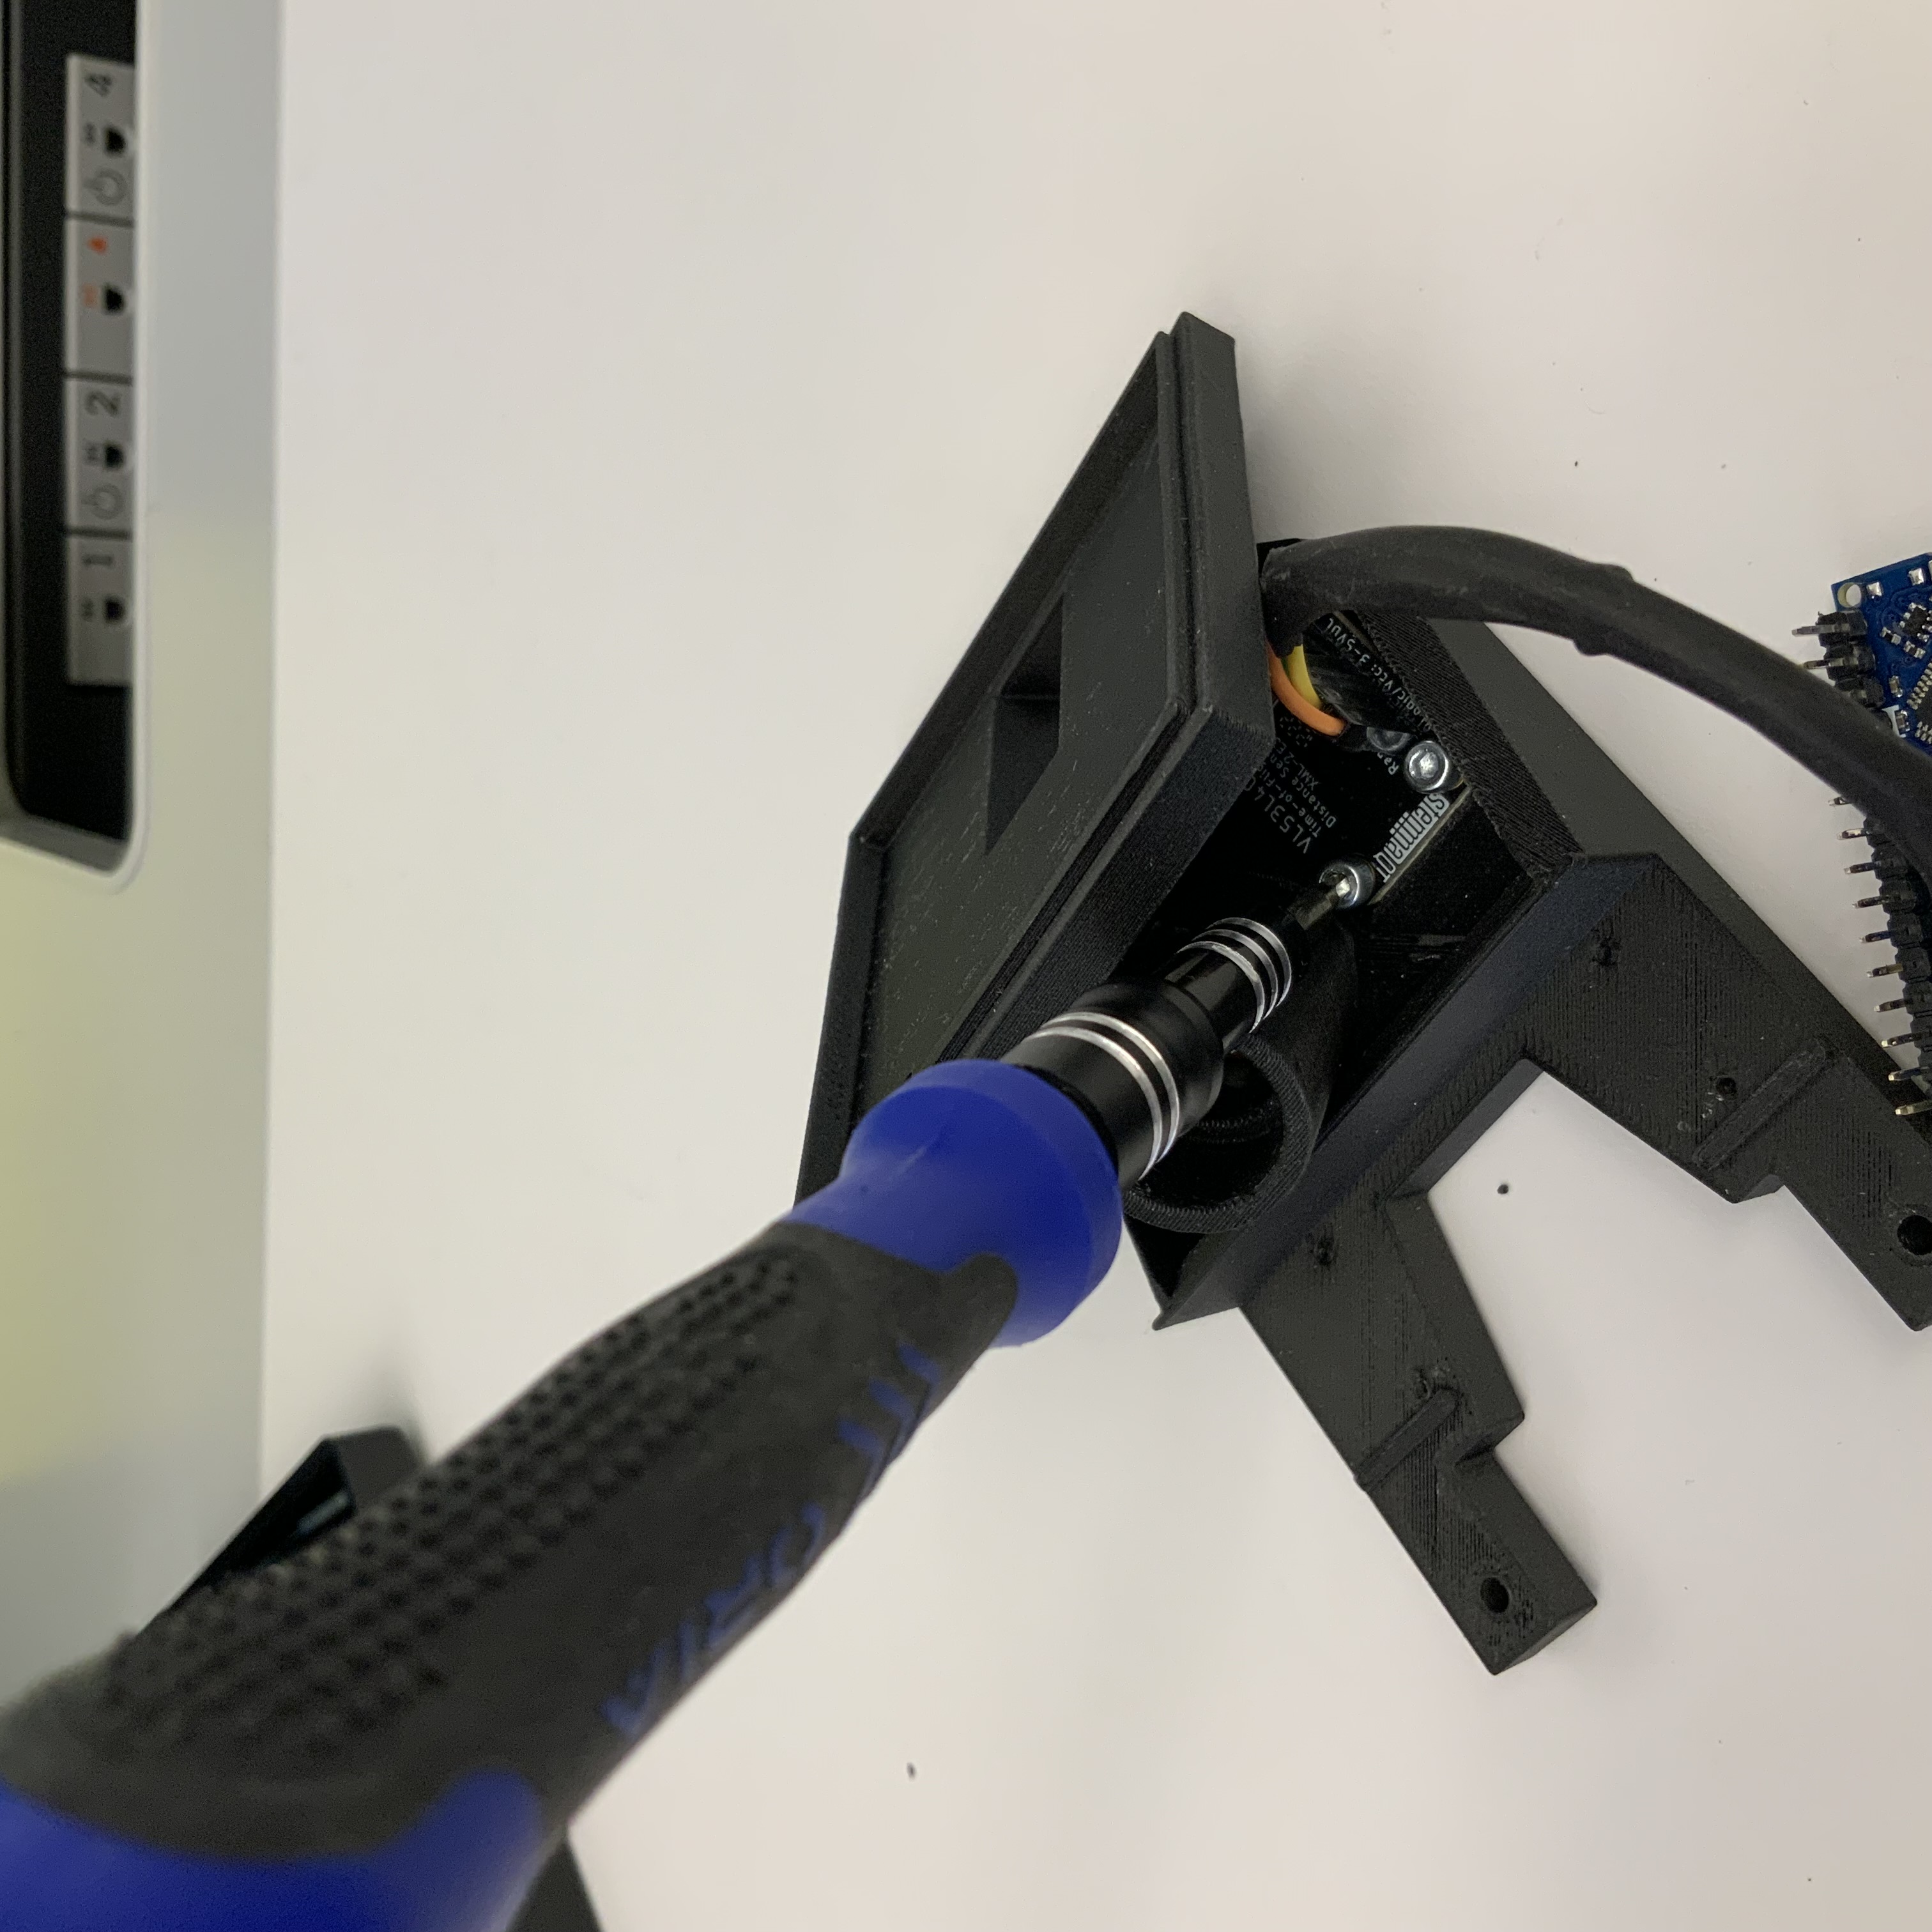
Bolt the TOF sensor into the gripper assembly.
-
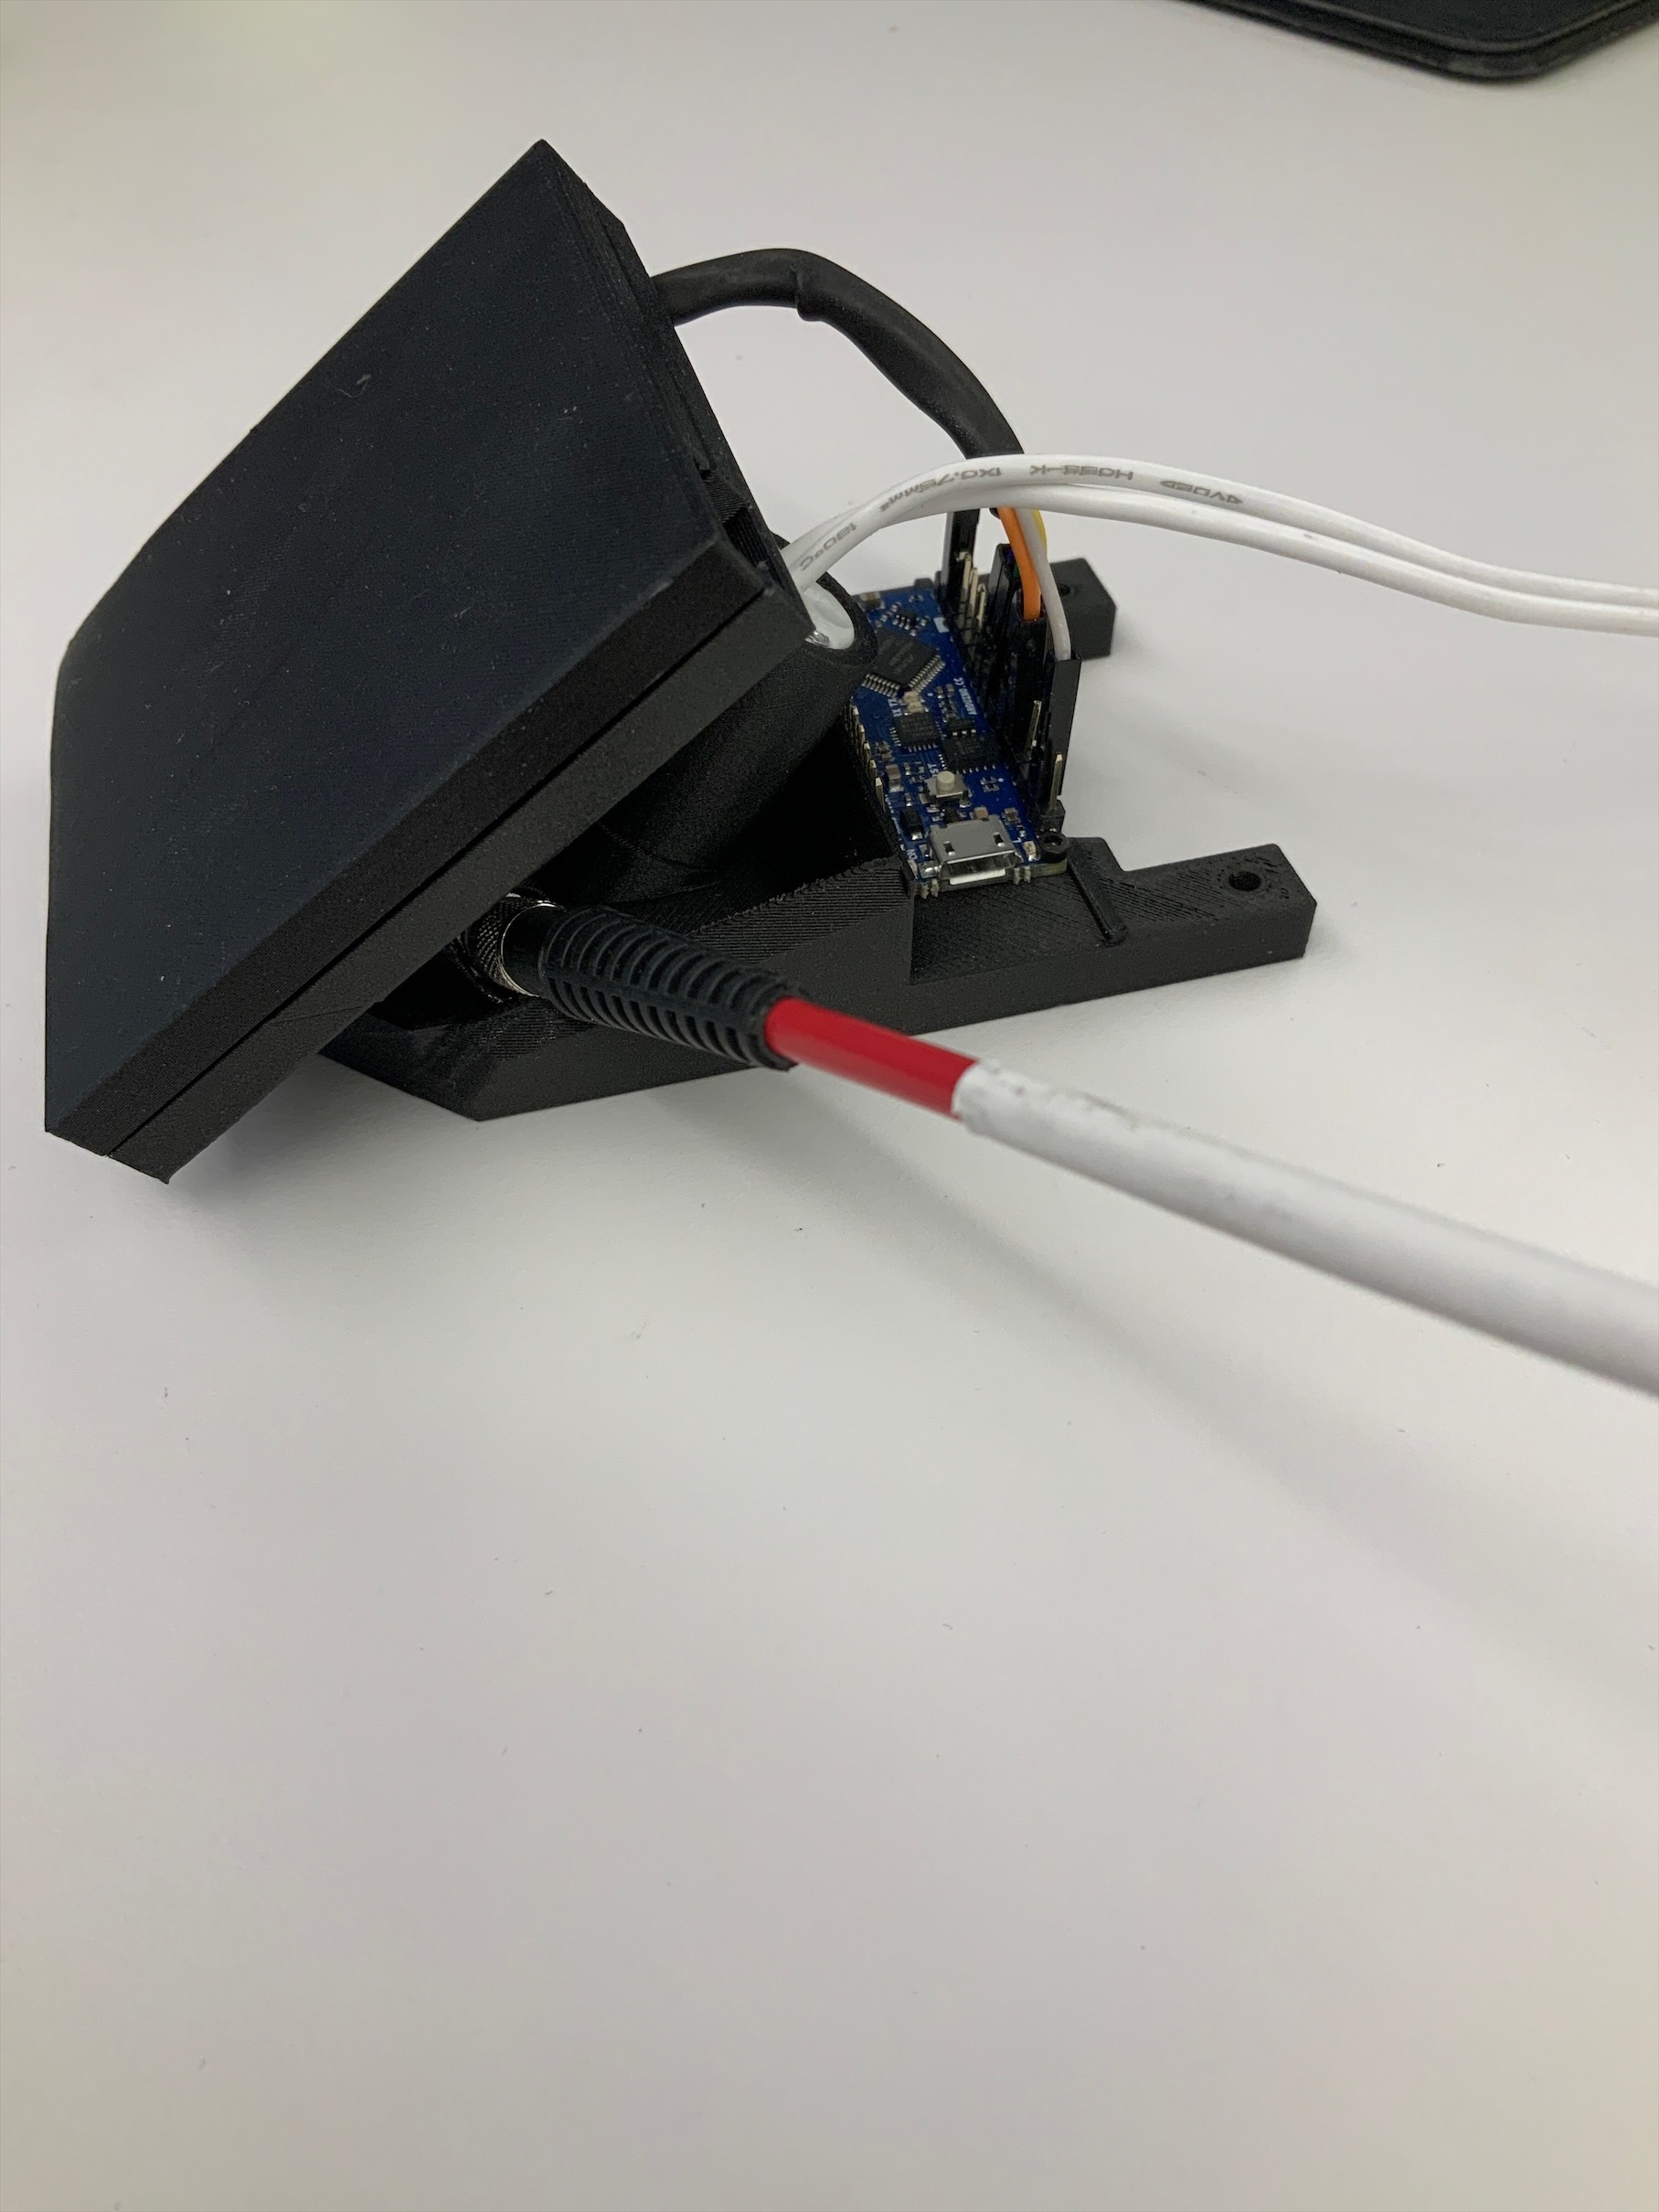
Bolt the Arduino Nano to the gripper assembly.
-
Insert the light socket assembly into the cylindrical hole.
-
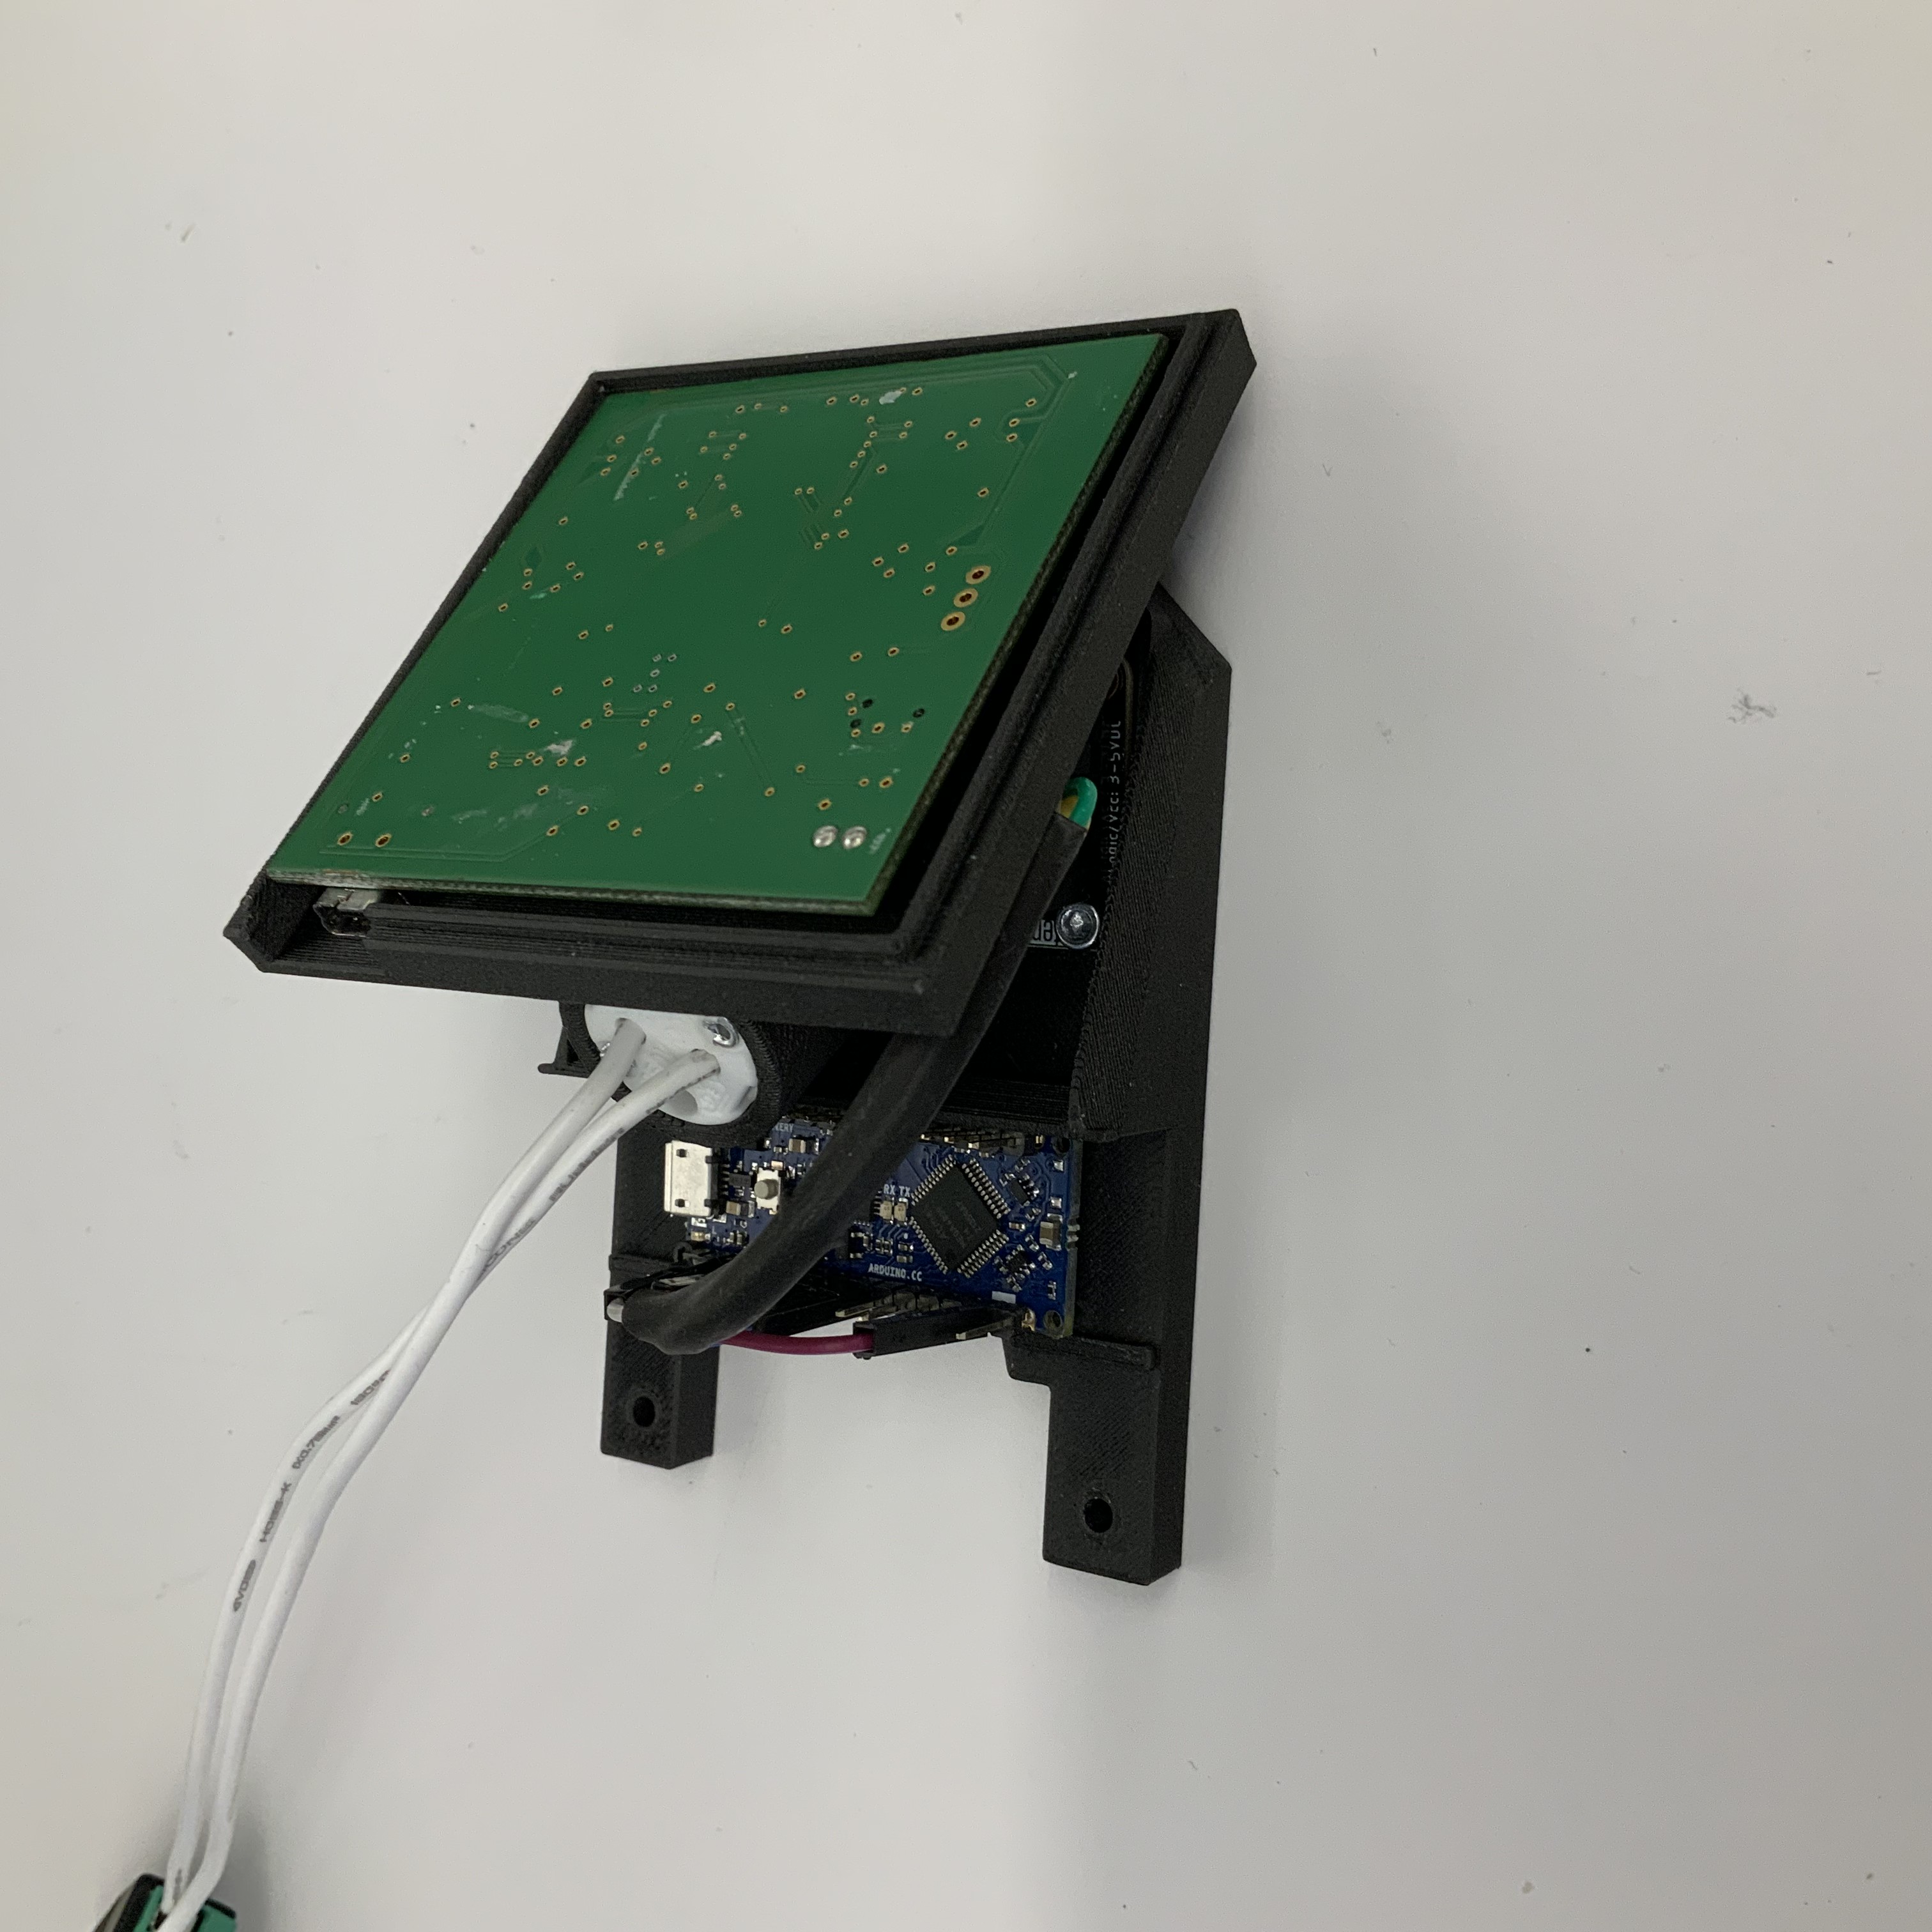
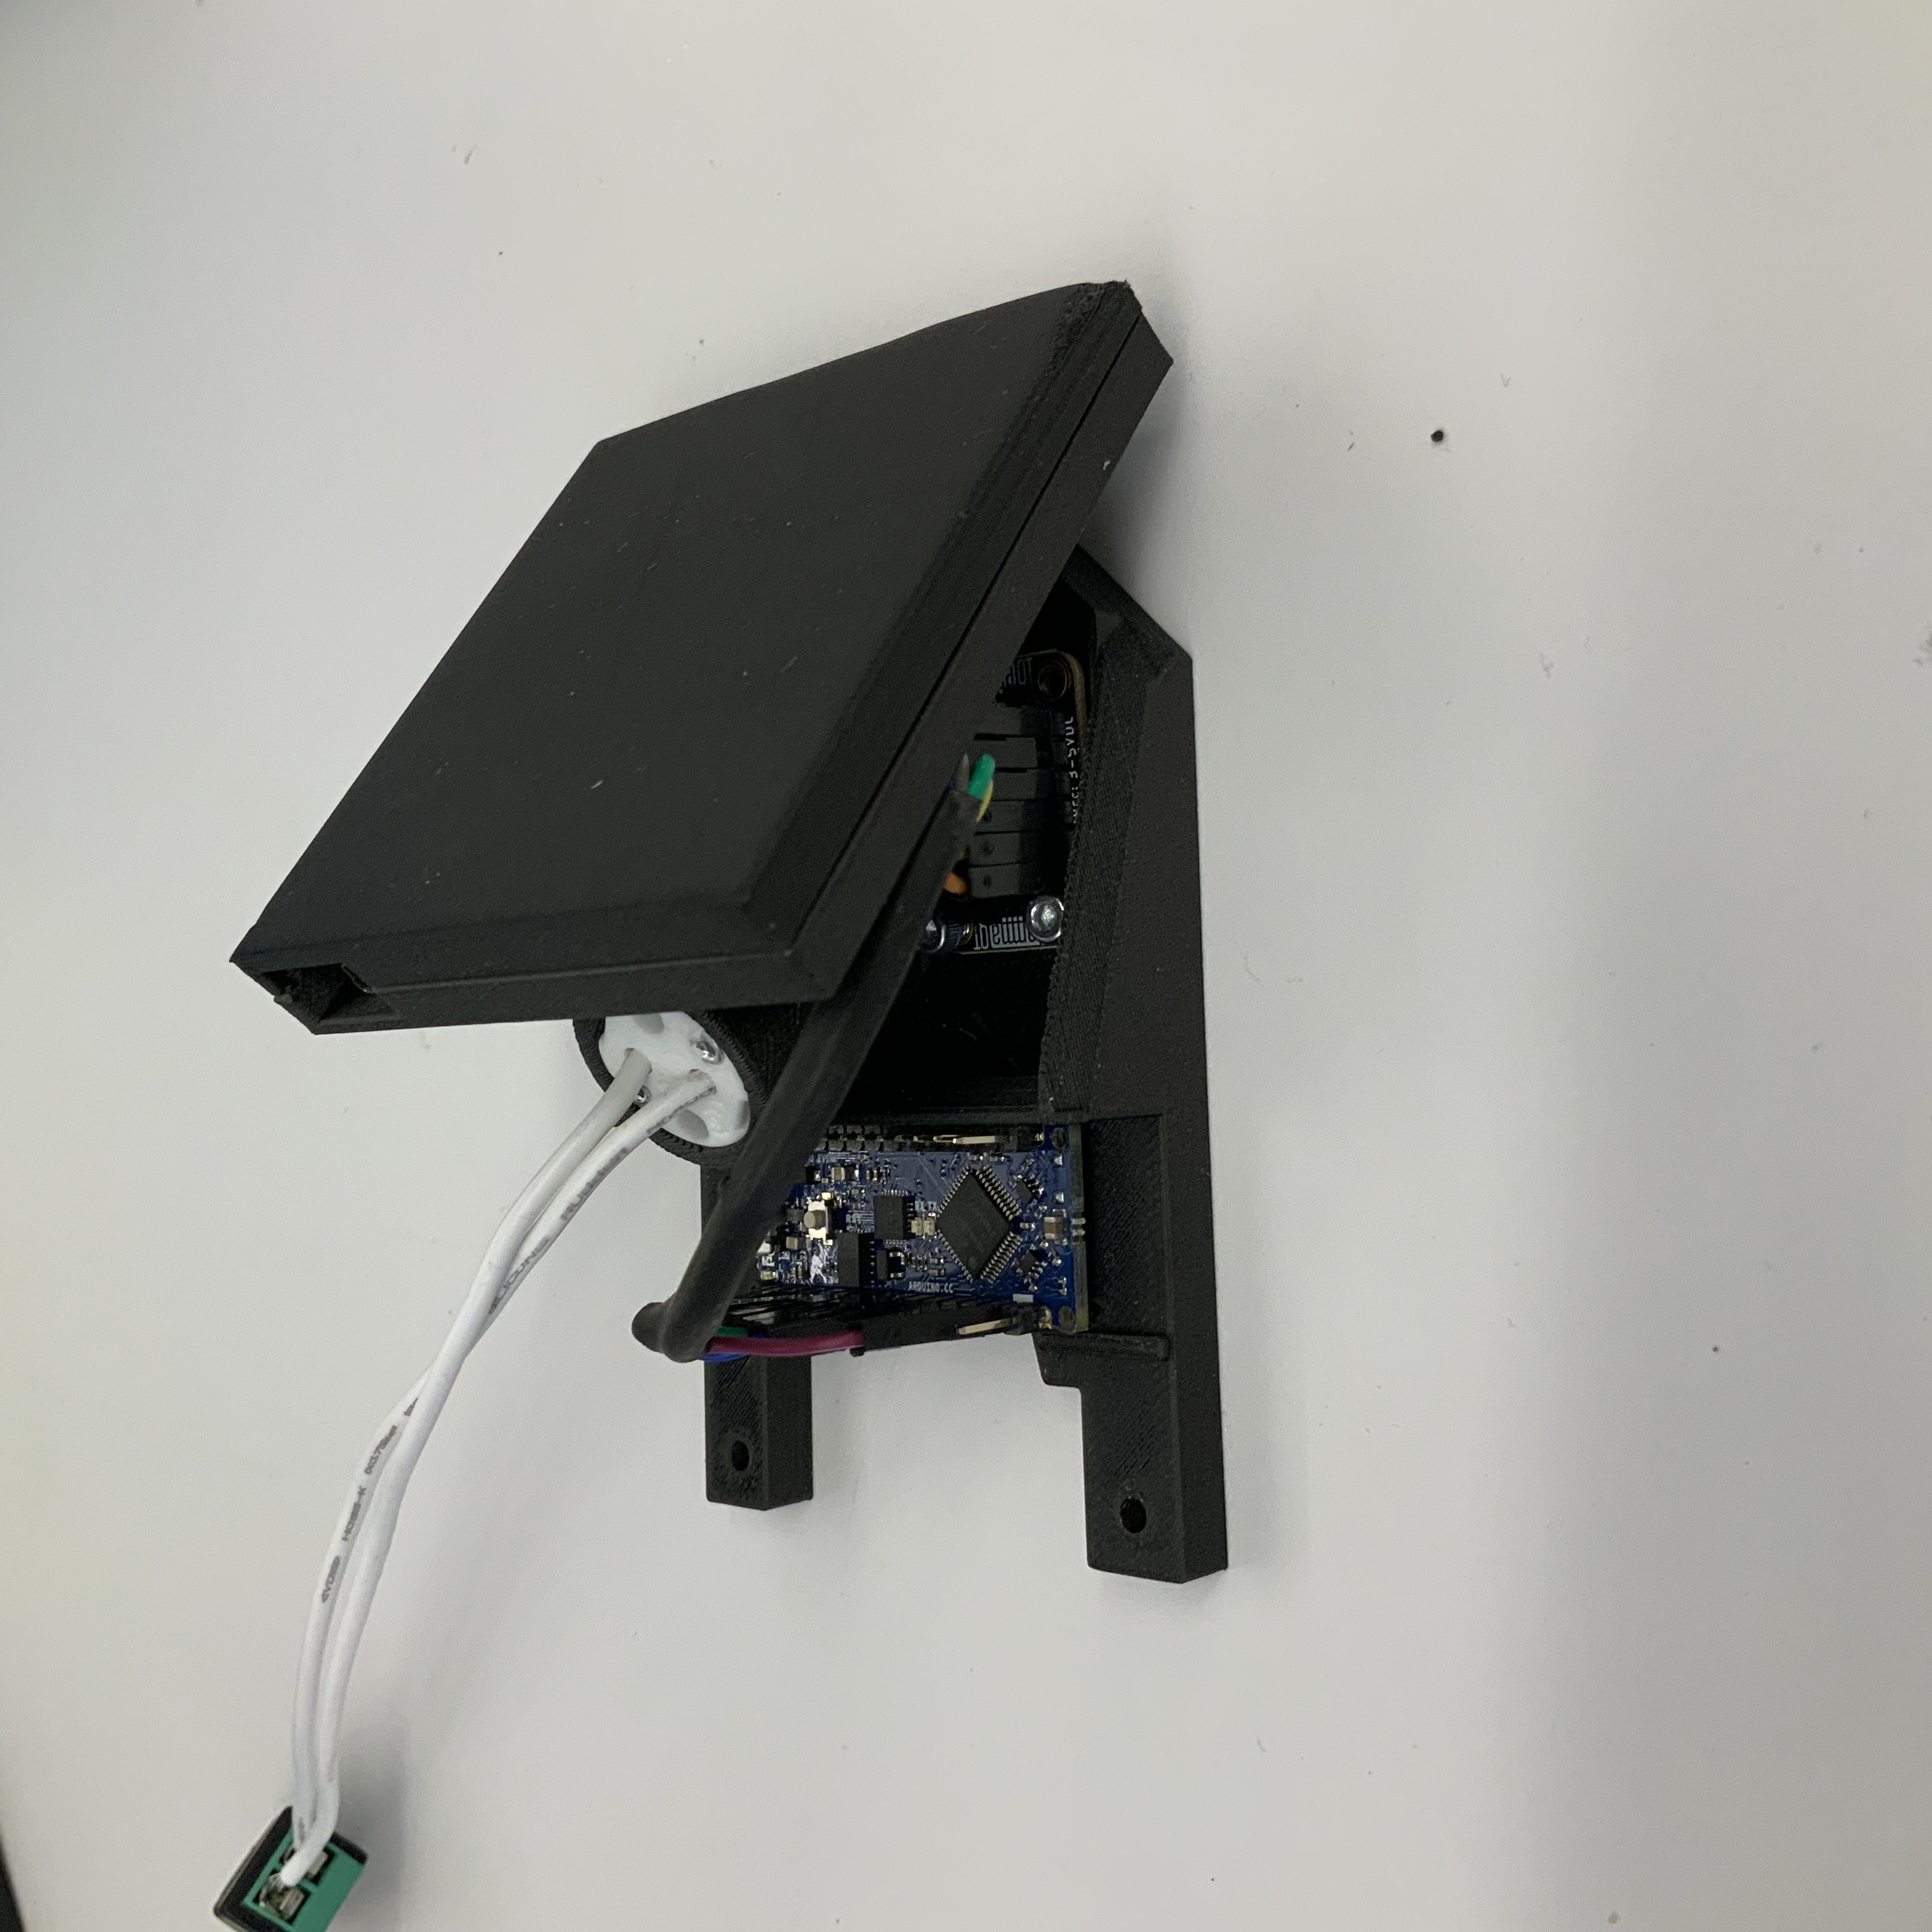
Place the Mantispectra OEM board facedown into the rectangular section.
-
Snap the printed cover into place over the OEM board.
-
Replace the two paddles on the Reactor Wrist with the sensor and reflectance tile grippers.

-
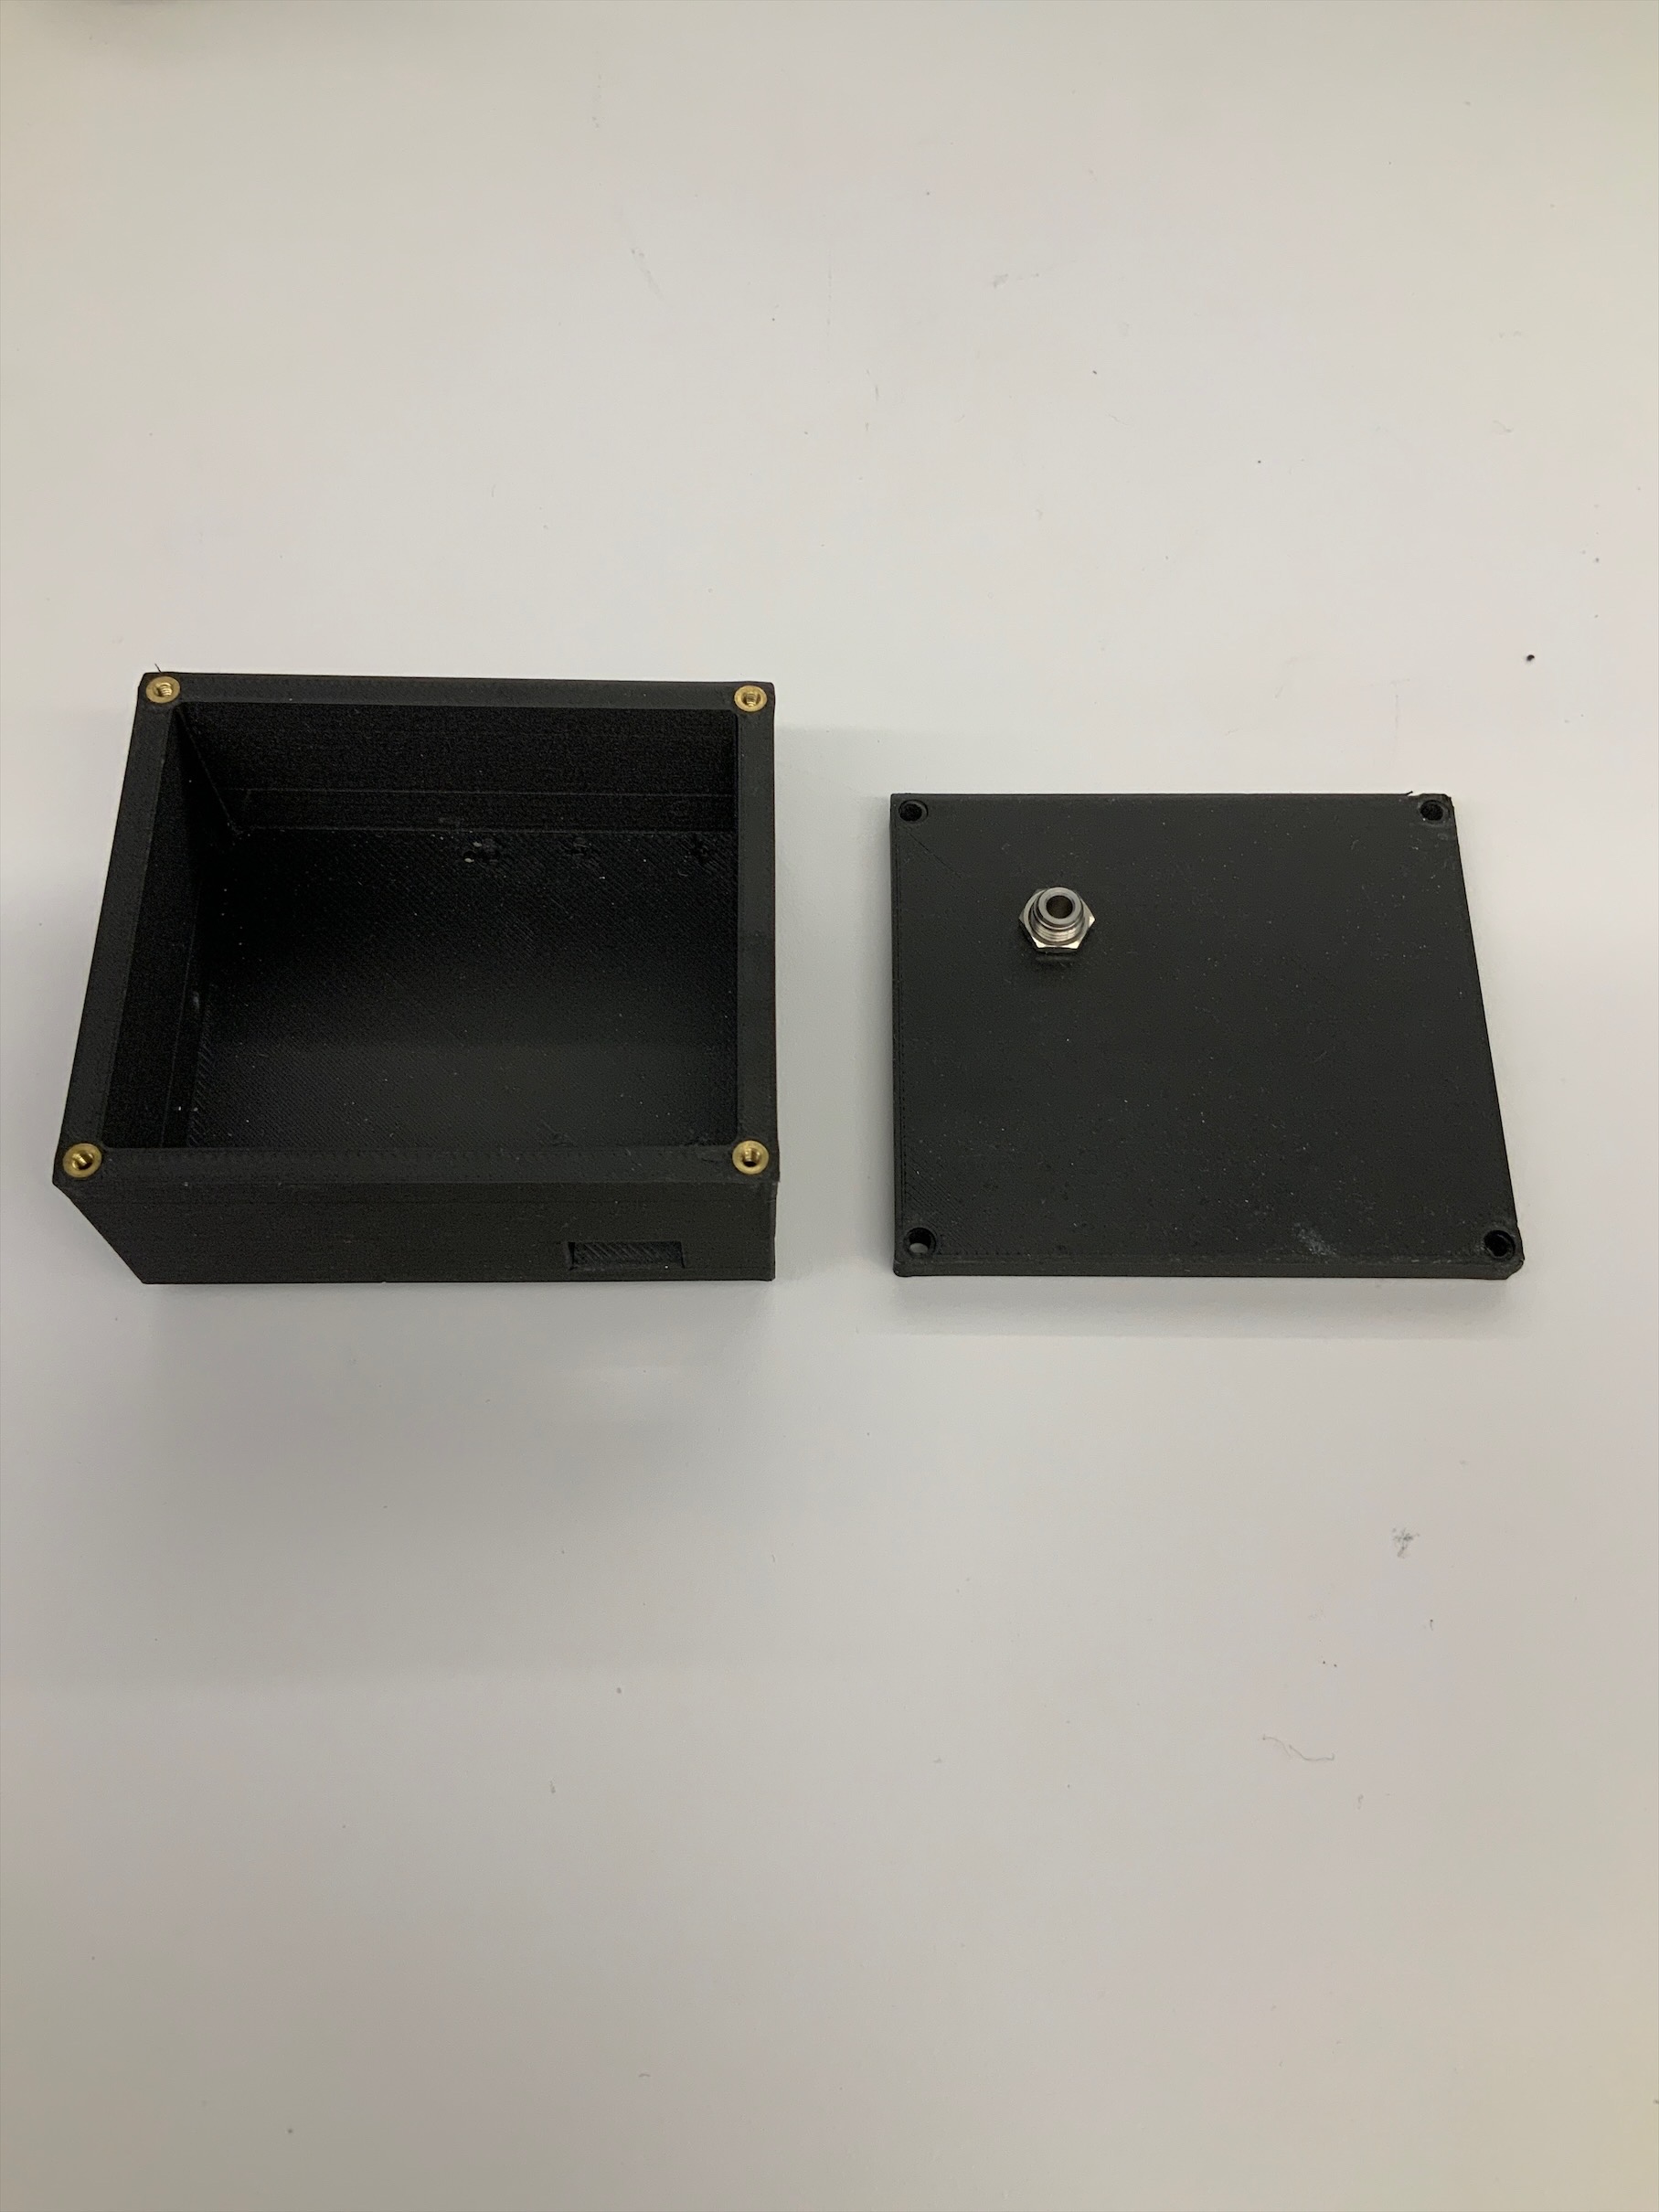
Thread the SMA bulkhead adapter through the lid of the spectrometer box. Tap the M2.0 heat-set inserts to into the box
-
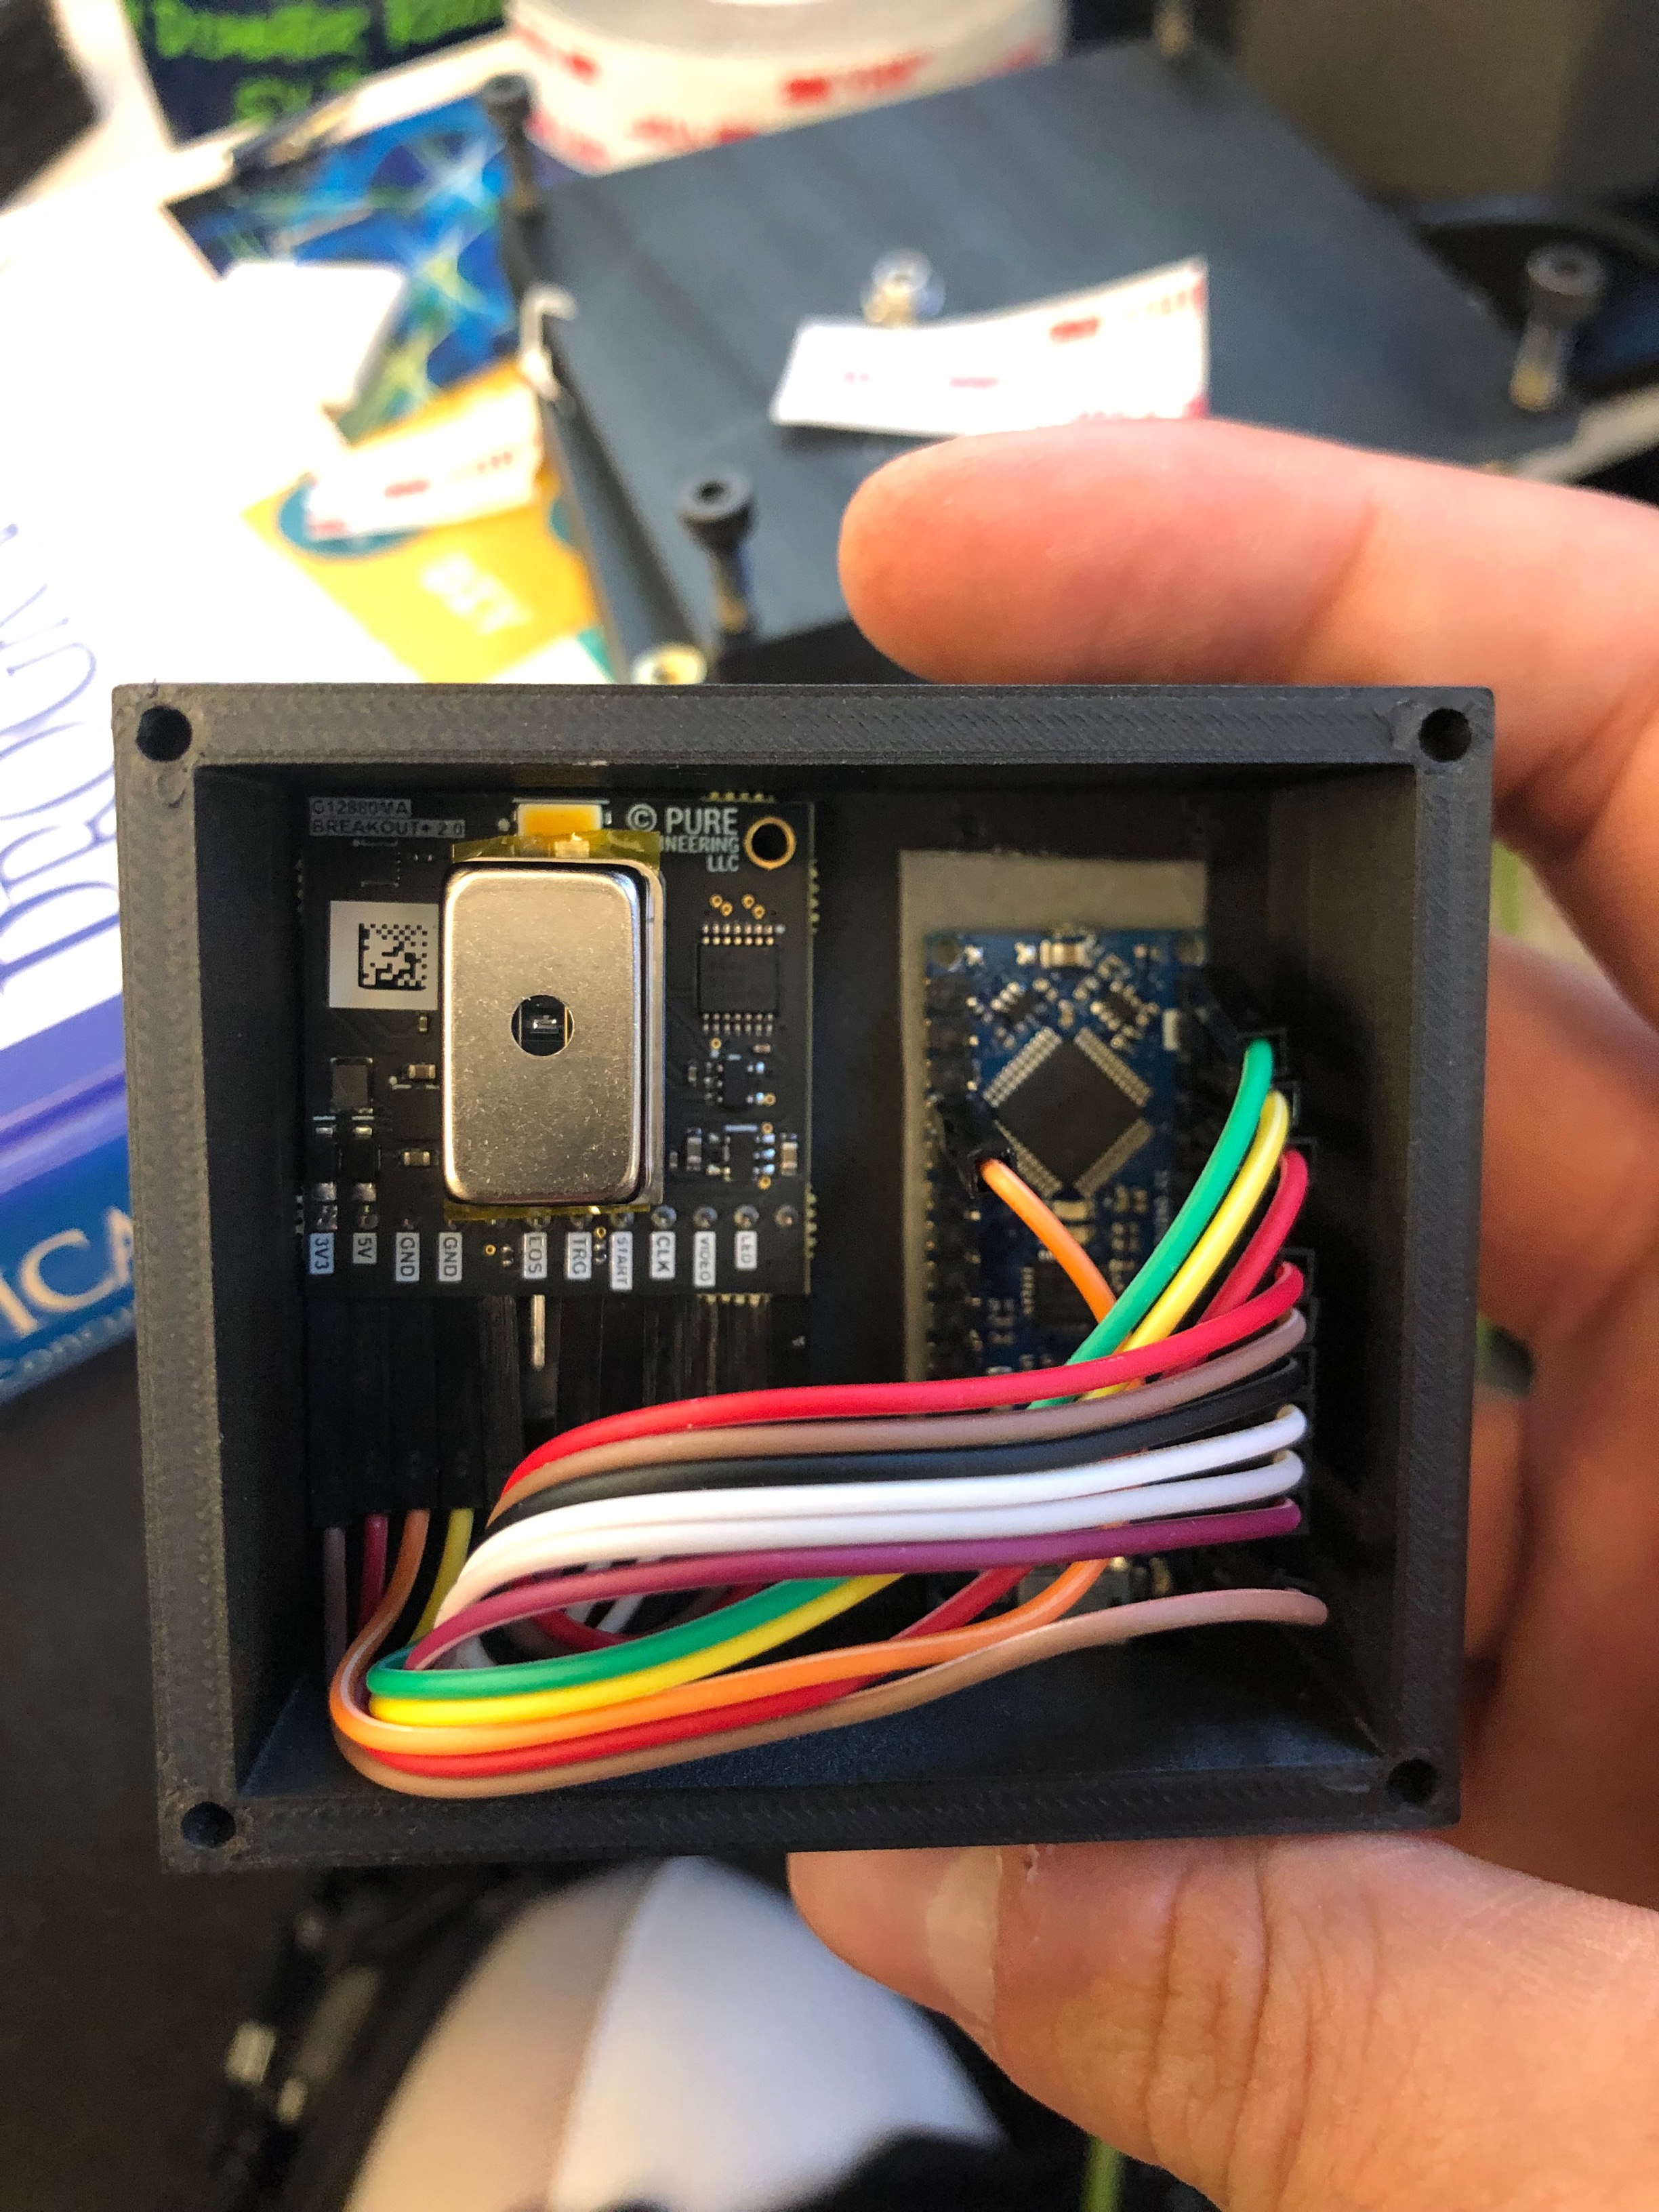
Using the wiring guide here connect the second Arduino Nano to the Hamamatsu spectrometer breakout board.
-
Adhere the Hamamatsu spectrometer and Arduino nano inside the box using double-sided tape. Align the aperture of the spectrometer with the opening on the SMA connector. Attach the lid using the M2.0 bolts.
-
Attach the fiber optic patch cable from the gripper to the box by screwing on the SMA connectors.
Final instructions
Upload the Arduino sketches from the GitHub repo onto the gripper and ToF Arduino Nano devices. Connect each of the Arduino Nanos and the Mantispectra boards to the computer with USB cables.